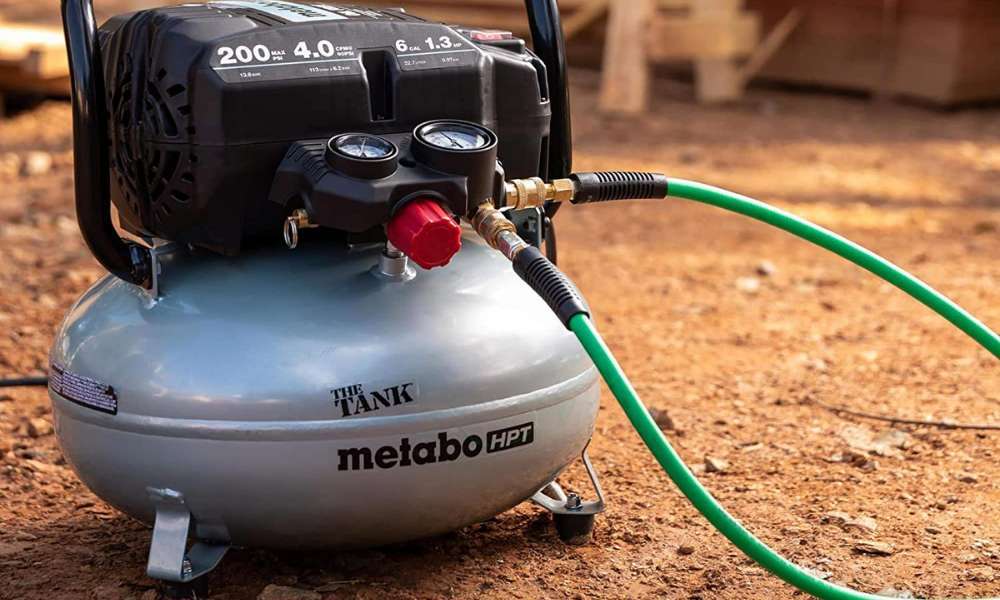
There is no debate that every home needs to have an air compressor due to all the benefits that they bring. Note that air compressors come in handy during different situations, including painting, cleaning, and much more. Due to their usefulness, many companies are rushing to meet the demand by developing different kinds of air compressors.
However, some of these machines can be rather noisy. In most instances, the cheaper variants produce the loudest noises. Even the quiet models aren’t super-quiet if you ask me. What this means is that you will need to find a way to reduce the noise level.
Understand that loud noises will make it quite difficult to achieve optimum results in the workplace. Having a quiet and serene environment boosts both productivity and quality. Luckily, you have come to the right place. Today, I will walk you through the different steps to quiet an air compressor.
How to Quiet an Air Compressor
Things You Will Need
High-quality sound blanketMufflerRubber mat or old piece of carpetRubber grommetsPlywood or drywallFoam insulation panelsEar protection
Step 1 : Use a Good Sound Blanket
Your air compressor has different sources of noise including the exhaust, motor, and intake. Understand that the best way to quiet all the three above is by using a good-quality sound blanket. Note that these are heavy and dense blankets that cover the whole of your compressor.
According to experts, a universal-fit sound blanket can reduce up to 40% of the noise. However, you need to ensure that the airflow to your motor intake is not restricted. You will also have to allow airflow into the exhaust, especially if you have one of those gas-powered models.
The good news is that you can always ask a professional to wrap your air compressor for you. Understand that having a professional carry out the installation will guarantee long-lasting services. The only downside is that you will need to spend a few extra dollars.
Step 2 : Attach a Muffler
Although a good-quality sound blanket will cover the entire compressor, it would also help if you attached a muffler to help reduce the intake noise. However, understand that a muffler only silences the intake and filter.
Because the motor makes the loudest noise, attaching a muffler is of little help without a sound blanket. The good news is that these mufflers are cheap and easy to install. You don’t need to be handy to install a muffler correctly.
Understand that every little noise reduction helps. It is, therefore, important that you don’t overlook the importance of attaching a muffler. Note that air compressors can be rather noisy, making it unbearable to work effectively. A little noise reduction can come a long way in ensuring you get a professional finish during your next project.
Step 3 : Deal with the Vibration
When your compressor motor is running, there are significant levels of vibration. If your compressor is installed on concrete floors, the levels of vibrations are significantly high. Note that most compressors are installed on garage floors, which usually feature hard-concrete floors.
Reducing the levels of vibrations needs to be a top priority, especially when working in a crowded neighborhood. Ensure you install your air compressor on absorbent material, such as an old piece of carpet or rubber mat.
Understand that reducing the levels of vibration will reduce the noise levels by almost 15%. You will, therefore, enjoy working in a quiet environment. Note that cheap devices in the market usually have the highest levels of vibration.
Step 4 : Isolate Parts Using Rubber
Do you know what separates the high-end air compressors from the cheaper options? Well, the build material of the different parts makes all the difference. Understand that manufacturers will cut corners by using metal to connect the different components.
Note that the metal connectors will mean a lot of extra vibration, shaking, and noise. Thankfully, you can reduce the noise levels by using rubber grommets. Understand that once the different pieces of your air compressor don’t shake or vibrate, the noise level will be significantly reduced.
The good news is that you can design rubber grommets by yourself if you are handy. However, you could always find affordable pieces in the local stores. Ensure that every part of your air compressor is isolated properly using rubber grommets to reduce the noise level.
Step 5 : Build Around Your Air Compressor or Take it Outside
If you are still experiencing loud noises after carrying out the above steps, you need to consider either taking the compressor outside or building around it. All you need to take the compressor outside is an extended intake. Note that you can place your compressor outside and feed the intake through the window or door.
Understand that taking your air compressor outside should be your last resort to getting rid of the noise. Note that taking it outside will expose it to the elements. Your neighbors might also be bothered by the loud noises if you take your compressor outside.
What happens if taking your compressor outside is not an option? Well, you can always build around it. However, before we start building around it, note that taking it outside is a much simpler fix if you aren’t living in a crowded neighborhood.
Building around your air compressor will need a lot of effort and time. Note that you have to construct a makeshift room from scratch to contain the compressor. Most people find this to be rather difficult and tiresome. You will also have to interfere with the aesthetics of your home, which might not be ideal.
Use drywall or plywood and combine with foam insulation panels to construct the makeshift room. However, note that you can always use specialized soundproof material to ensure you get the noise levels reduced to a minimum.
Again, don’t forget to allow ventilation around the exhaust and intake of gas-powered compressors. Getting enough ventilation for these models will ensure you get long-lasting services. Understand that compressors are rather expensive. You don’t want to end up shopping for a new air compressor within a couple of years.
Step 6 : Use Ear Protection
Using the steps above, you can significantly reduce the noise levels of your air compressor. However, you need ear protection to get the noise levels to zero. Understand that good-quality ear protection will guarantee quiet and smooth operations.
Ear protection also guarantees that you don’t hurt your ears while working on any project in the workplace. Understand that the ears are rather sensitive and could easily get damaged. It is, therefore, important that you get a pair of earplugs or construction-site ear protection. Doing this will ensure you work for long hours without compromising your hearing.Conclusion
Air compressors are a must-have for any workshop or home. Understand that these machines have several applications that make them quite versatile. You will get a good quality finish when working with different air tools at home or in the workshop.
Hopefully, the above step by step guide will help combat the loud noises of these machines. However, ensure that you use ear protection every time you use your air compressor. Doing this will ensure you safeguard your ears from any damages due to prolonged exposure to noise.
Related Article:best quite air compressors
Conclusion
Air compressors are a must-have for any workshop or home. Understand that these machines have several applications that make them quite versatile. You will get a good quality finish when working with different air tools at home or in the workshop.
Hopefully, the above step by step guide will help combat the loud noises of these machines. However, ensure that you use ear protection every time you use your air compressor. Doing this will ensure you safeguard your ears from any damages due to prolonged exposure to noise.


Leave a Reply