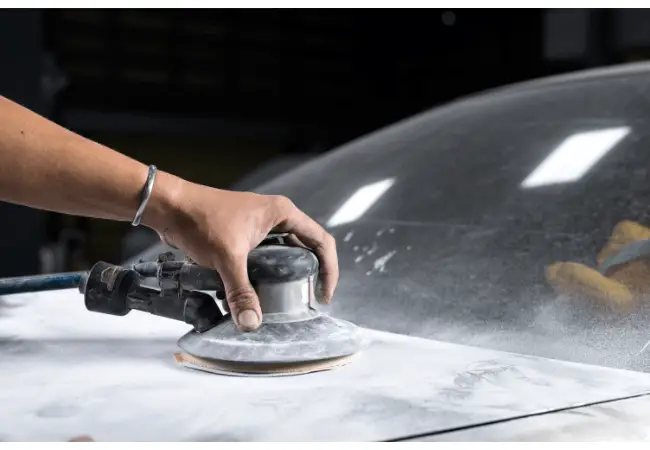
A well-sanded car is already halfway to getting itself a glossy, eye-catching finish. However, getting to that halfway mark can be slightly tricky. While there are different sanders available, most industry experts and professionals will recommend using a Random Orbital Sander for this purpose. Learn the best method for sanding your car with a random orbital sander.
The Random Orbital sander has certain additional advantages compared to its conventional counterpart. While the orbital sander restricts itself to only one plane of motion, going back and forth along a line, the random orbital sander also adds a circular motion to this back and forth motion. This extra to-and-fro wobble adds a lot to the efficiency of this sander.
A random orbital sander also tends to be more aggressive than the orbital sander. It tends to displace more material compared to the conventional one, thanks again to the extra plane of motion it adds to the process.
Contents
Prepping Your Car For Sanding
Before you bring out your sanders to get your car ready for a new look, there are certain things to be noted. Since the sanding pad is circular in a random orbital sander, it is impossible for one to properly sand the corners and edges by using a sanding machine; you will have to sand some parts manually.
For this purpose, we recommend removing any exterior trim parts before you go about your sanding job; this includes your car’s bumpers, side skirts, spoilers, and other items of aesthetic value. For the doorknobs, door trims, and window trims, we recommend taping them properly; this will keep them safe from any unwanted abrasion or damage.
As for the trims you remove before sanding, we recommend using manual sanders and sanding rulers to get the job done effectively. Manual sanding will allow you to get into the corners and crevices better, resulting in a more consistent finish throughout. Do not forget to remove the headlights and the taillights.
Dealing with Rust and Dents
If rust has damaged your car’s surface, you will have to repair those spots before you start sanding. If the rust has damaged the car’s base metal, taking it to a professional is your best course.
However, if the rust is not substantial, you can simply sand the rusted area and get rid of any pockmarks or minor dents. If required, use a filler compound to fill the dent and let it dry. After that, you can simply sand it to smoothen the surface out.
The same works with dents made by impact damage. If the dents are deep, we recommend getting professional help. On the other hand, you can simply give the more minor dents the same filler treatment discussed above. These filler compounds are easily available in the market, with some specifically made to cater to car damage.
How To Sand Your Car
What You’ll Need
- A Random Orbital Sander with variable speeds
- Sandpaper Disc Pads with different coarseness (depending on your sander’s size)
- Manual sander, sanding rulers
- Masking Tape
- Protective Mask and Eyewear
- Mechanic gloves
- Vacuum Cleaner
Before starting, wear all protective equipment properly since you will be dealing with toxic materials. Ensure that the trim parts have been either removed or taped off before you start sanding. Since these are not plain surfaces, using an electric or pneumatic sander on them may end up inflicting more damage to these parts than bargained for.
Once all the trim parts are removed, you can bring out your random orbital sander. Most modern orbital sanders have holes in the rotary pad, which accumulate any dust produced during the sanding process. In small-scale applications, the dust and eroded material is collected in the container attached to the machine.
Since our application here is larger, the attached containers won’t suffice. Instead, you can directly connect the dust outlet to a vacuum system for easy collection and disposal.
Sanding Procedure
Initially, you want to start with the coarsest sanding pad you have. If you plan to sand right up to the base metal, we recommend starting at 180-grit. If you are only trying to get to the primer coat, you can begin with less coarse pads.
To sand properly, maintain even (light) pressure on the sander and keep it perpendicular and flat on the surface at all times. Ensure that you do not try to sand the edges since the circular sanding pad won’t cover them uniformly. It can end up in unwanted damage to the metal.
Once you finish sanding with coarse grains, start working your way up towards higher-grit sandpapers. This process removes any scratches that might have appeared in the coarser settings. It will result in a smoother finish that will hold on to primer or paint well.
Also, since you’re using a random orbital sander, you won’t have to worry about which direction you take your sander in; just ensure you get uniform coverage. It is also necessary to keep the sander moving at all times in a smooth flowing motion. There is debate over the exact number, but 1-1.5 inches per second is usually considered the best speed for you to move.
If you feel the sandpaper is losing its grit, you can quickly switch it out for a new one and continue working.
Once you feel that the uppermost paint coat and the primer coat have been sanded off, you can stop sanding. Ensure that you have made uniform passes throughout the car.
For sanding the trim parts that we removed earlier, we suggest using a hand sander, or even better, a hand sanding ruler. If you are unsure which one to go for, we recommend these products.
Things To Keep In Mind
Because of its unique motion, the random orbital sander mostly never follows a uniform path of motion, which explains its name. This randomness ensures that the target surface gets a smooth finish without the fear of any cross-grain scratches.
The risk of cross-grain scratching is considerably more in an orbital sander since it works in one plane of motion. Even one small detour can cause scratches that will be instantly noticeable on a smooth surface.
Since a random orbital sander also tends to be more abrasive, you must keep the sander in a smooth fluid motion at all times. If the sander is kept in a single spot for more than the required time, it will affect the base material of the car, or it will sand through the layers you wanted to keep intact. In the worst-case scenario, it might create a depression in the base material, which is something you do not want to deal with.
Best Sandpaper Grits
Also, ensure to do some thorough research before getting the sandpaper for the job. If you want to sand through to the base metal of the car, we recommend starting at 80-grit sandpaper and then progressing to less-coarse sandpapers.
If you are planning to take the uppermost coat of paint off, then begin with 180-grit sandpapers and progress to higher grits. You should use extreme caution is recommended while working with coarse sandpapers. Keep your hands well clear off the sandpaper while working.
Sanding your car is not rocket science but rather a skill that is easy to learn but hard to master. A perfectly sanded piece of metal allows other materials, including primer and paint, to adhere to it well. Using the simple steps mentioned above, you can also be very well on your way to achieving a new classy finish for your car.
Related Article


Leave a Reply