Spray painting has become quite popular in recent years. The use of rollers and brushes is slowly fading away, especially when it comes to knowing how to spray paint a house interior. A few years ago, paint sprayers were considered inefficient and wasteful when painting large surfaces. However, advancements in technology in equipment and paints have made spray painting a viable option.
When you have a large house interior to paint within a short period, using spray paint is the best option. Now, the interior of the home includes the wall and ceiling. In this article, we will take an in-depth look at interior spray painting.
Contents
- 1 How to spray paint ceilings and walls
- 2 Pro Tips
- 3 FAQ’s
- 3.1 What kind of paint do you use to spray paint a house interior?
- 3.2 Is it better to spray paint or roll paint a house interior?
- 3.3 How much does it cost to spray paint a house interior?
- 3.4 What equipment do I need to spray paint my house interior?
- 3.5 Q: How do I prepare my house for interior spray painting?
- 3.6 What safety measures should I take when spray painting a house interior?
- 3.7 How long does it take to spray paint a house interior?
- 3.8 Can I spray paint over existing paint in my house interior?
- 3.9 Conclusion
How to spray paint ceilings and walls
When you are a beginner in using paint sprayers, you have to set up an area to test out your paint sprayer. A piece of wood or old newspaper will create an excellent canvas to try out spray painting. A little practice will ensure that you get the work done effectively and faster when you spray paint interior walls.
Understanding how to spray paint the interior of houses will incur a bit of a learning curve. You must get used to how your paint sprayer works before you can start spray painting walls and ceilings of your house interior.
Spray painting the walls
Step 1: Preparation
If you are planning to spray paint the interior walls only, then start by masking the ceiling properly. Use paper in masking the ceiling, doors, windows, and all other fixtures. Move all furniture to the center of the room and cover them adequately.
Step 2: Prepare the wall surface
You need to prepare the wall surface before you can start to interior spray paint the house or rooms. Use a soft cotton cloth to clean your walls thoroughly.
Doing this ensures that all grime and dust are removed from your walls. Proper preparation of your walls ensures that you get a professional finish. Use high-quality putty to fix uneven places and cracks on your wall. Understand that uneven surfaces will look awkward after the paint job.
Step 3: Preparing the paint
Painting interior walls with a paintbrush and roller is entirely different from when using a sprayer. This means that your paint needs to be prepared differently, as well. Your paint needs to be thinner than what you would typically use with a roller or brush.
Take your paint and pour it into a large bucket. For every gallon of paint, you need to add ½ cupful of water. Stir the mixture thoroughly using a clean stick and check the consistency of the paint by pouring it through a funnel.
Step 4: Painting your interior walls
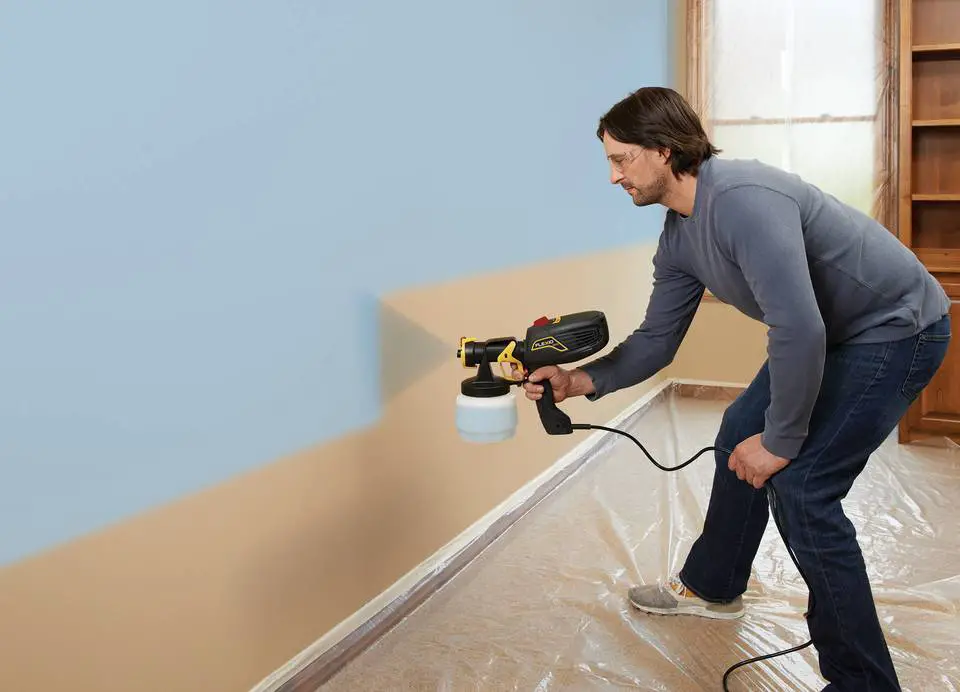
When spray painting walls, you need to start in one corner and work across your wall. Ensure that you hold your paint sprayer at a distance of about 300mm from the wall. You will get even strokes when the paint sprayer is held at a comfortable distance from the wall.
The corners are usually the most difficult areas to spray paint, making it essential to start here. Try holding your sprayer sideways to give you better control. Ensure that you paint all your corners first before we can move to the walls.
Start with your walls once you are done with the corners. Focus on one wall at a time, and don’t worry about the other walls that you have not started working on. Keep your spray paint machine at a 90 degrees angle and spray as far as you can.
Ensure that you overlap your strokes both horizontally and vertically when moving to the next section. This guarantees that you get an even coat and smooth finish in the end.
Once you have completed spray painting walls, you will need to let the paint dry for a few hours. Once your paint is all dried up, you can do a second coat to get a better finish.
Spray painting the ceiling
With the right technique and procedure, spray painting your ceilings can be more relaxed and quicker. In case you are interested in painting the ceilings only, then mask off the upper walls. Runs and drips will, therefore, not affect your wall painting once you do this.
When spray painting your ceiling, ensure that you move slowly while overlapping the strokes for a better finish. Ensure that you don’t set yourself directly underneath your paint sprayer to avoid drips getting on your outfit. When painting your ceiling using a paint sprayer, start with a low-pressure setting and slowly increase it until it feels right.
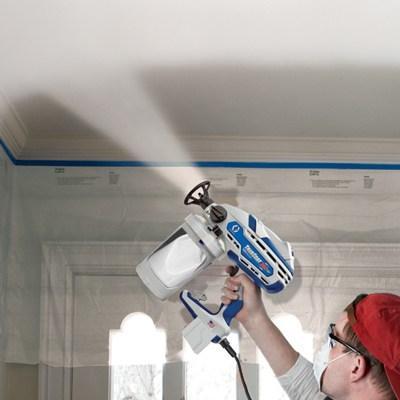
Using high pressure from the get-go will create runs along your ceiling, making it impossible to get a professional finish. If your ceiling is about 9 feet high, then you could complete the entire project from the floor. You will not need to use any ladders because your paint sprayer can get the paint to the ceiling effectively while you are standing on your floor.
A higher ceiling will require the use of a ladder—exercise caution when using the ladder to avoid any accidents. Moving the ladder around may be a bit hectic, but you could always get an assistant to help you out.
Cleanup
Let your walls and ceiling dry up for a few hours before you start removing tape from the trim. You will get clean lines when you let the paint dry out thoroughly first.
Proceed to remove all the coverage from the furniture and any other areas. You can then proceed to replace all the light fixtures that you had removed when you started the process. Ensure that everything goes back exactly as it was once you are done with spray painting your house interior.
Your paint sprayer needs to be cleaned after every use. Your user manual will have detailed instructions on how to clean the paint sprayer. The standard cleaning procedures include the use of either a bucket or water-based materials.
Cleaning your paint sprayer after every use ensures that you get a quality finish when working on your next job. You will also get prolonged use from your paint sprayer when you clean it regularly.
Pro Tips
Spray paint walls before the ceiling
When working on any home interior spray painting project, you must start with the walls before moving on to the ceiling. Paint your walls and let them dry for a few hours, then proceed to begin spray painting the ceilings.
Cover the walls using plastic and tape to ensure that no paint drips or runs get to the walls. Understand that if you start with the ceiling, you will have to mask the ceiling upside down. This can be quite difficult, and you will not get a smooth, professional finish.
Mix all your paint at once
When you plan on using two or more gallons of the same color paint, you must mix them all together in one plastic bucket. Understand that there is always a slight color discrepancy, even in situations when you have the same color paint.
Mixing all the paint ensures that you get an even tint. Sometimes you might notice the color discrepancy right away, and you might only see it once you are done with the entire project. In some cases, you might find yourself starting the whole project because you didn’t mix all your paint together.
Wear a respirator when using oil-based paint
Oil-based paints contain fumes that can be dangerous to your health. Understand that your sprayer sends out small particles into the air, making it more dangerous than when using a roller or brush. The tiny particles will lead to coughing and asthma-like symptoms.
When you expose yourself to the fumes for a prolonged period, you will get permanent damage. You don’t want to end up sustaining severe health problems when spray painting makes a respirator essential.
A proper respirator ensures that your lungs are protected from the small paint particles. All chemical fumes will also be filtered out, ensuring your health is safeguarded. Open up all the windows and doors whenever possible to get fresh air into the room while spray painting.
Use a spray gun extension for the ceilings
When working on our ceiling, a spray gun extension will come in handy. This extension is screwed onto the spray gun, making it easier for you to get the paint to the ceiling. Over-spray is reduced significantly when you use the spray gun extension for ceiling painting.
Using an extension also ensures that you can complete painting your ceiling quickly and with reduced fatigue. Understand that painting your ceiling can be a rather tasking project, especially when you can’t get to all the areas easily.
FAQ’s
What kind of paint do you use to spray paint a house interior?
A: When spray painting the interior of your house, it’s best to use water-based paints such as latex or acrylic. These paints are easy to clean up, dry quickly, and have lower levels of toxic fumes. However, you can also use oil-based paints if you want a smoother and more durable finish.
Is it better to spray paint or roll paint a house interior?
A: Both methods have their advantages. Spray painting can cover large areas quickly and evenly, making it a good choice for walls and ceilings. However, it can be messy and requires careful masking of areas you don’t want to be painted. Roll painting gives more control, especially around trim and in tight spaces, but it can be slower and require more effort.
How much does it cost to spray paint a house interior?
A: The cost of spray painting a house interior can vary depending on a number of factors including the size of the house, the type and amount of paint used, and whether you’re doing it yourself or hiring a professional. On average, you might spend between $2 to $6 per square foot. Always get estimates before starting a project.
What equipment do I need to spray paint my house interior?
A: To spray paint your house interior, you’ll need a paint sprayer, which can be either a handheld model or a larger unit with a separate sprayer and compressor. You’ll also need paint, a mask or respirator for safety, protective clothing, drop cloths to protect your floors and furniture, and painter’s tape for masking off areas.
Q: How do I prepare my house for interior spray painting?
A: Preparation is key for a successful spray paint job. Start by removing or covering furniture and floors. Then clean the walls thoroughly, patch any holes or cracks, and sand smooth. Use painter’s tape and plastic sheeting to cover windows, doors, and other areas you don’t want to be painted. Finally, prime the walls if necessary before starting to paint.
What safety measures should I take when spray painting a house interior?
A: Safety is crucial when spray painting. Always wear protective clothing, including gloves, goggles, and a respirator or mask to protect against paint fumes and overspray. Ensure the room is well-ventilated and take regular breaks to avoid prolonged exposure to fumes. Also, keep the paint and equipment out of reach of children and pets.
How long does it take to spray paint a house interior?
A: The time it takes to spray paint a house interior can vary greatly depending on the size of the area to be painted, the number of coats needed, and the drying time between coats. On average, it might take a few days to a week to fully complete the project, including preparation and cleanup.
Can I spray paint over existing paint in my house interior?
A: Yes, you can spray paint over existing paint in your house, provided the old paint is in good condition. If the existing paint is peeling or chipped, it’s best to remove it or sand it smooth before painting. Be sure to clean the walls and apply a primer if necessary to ensure the new paint adheres properly.
Conclusion
Spray painting the interior of your house can be an efficient and effective method to refresh and rejuvenate your living space. The process might seem intimidating at first, but with careful planning and the right tools, it’s an achievable task even for novice DIY-ers.
The first step is selecting the right paint. Water-based paints such as latex or acrylic are commonly used due to their quick drying times and low levels of toxic fumes. However, oil-based paints can be used for a smoother and more durable finish. The choice of paint can significantly impact the final look, so it’s crucial to consider the room’s function, the desired aesthetic, and the durability needs before making a decision.
The preparation phase is arguably the most critical part of the process. This includes removing or covering furniture, cleaning the walls, patching any holes or cracks, sanding surfaces smooth, and meticulously masking off areas that shouldn’t be painted. Neglecting this stage can lead to uneven finishes and unwanted paint on fixtures, trims, or floors. Remember, a well-prepared room leads to a smooth and professional-looking paint job.
When it comes to the actual spray painting, technique matters. Hold the spray gun perpendicular to the wall and maintain a consistent distance as you move it in a sweeping motion. Overlap your strokes by about 50% to ensure an even coat without drips or streaks. Practice your technique on a piece of cardboard or scrap material before moving onto the walls to build your confidence and skill.
Cost is another vital consideration. While the upfront cost of equipment might be higher than traditional painting methods, the time efficiency and smooth, professional finish provided by spray paint can make it a worthy investment. If you’re painting a large interior space or planning multiple projects, a paint sprayer can be a valuable tool in your DIY arsenal.
Safety should never be overlooked. Always wear a mask or respirator, as well as protective clothing, to protect yourself from paint fumes and overspray. Ensure the room is well-ventilated during and after the painting process to dissipate any lingering fumes.
Finally, remember that patience is key. Allow ample time for the paint to dry before applying additional coats, and wait until the paint is fully cured before moving furniture back into the room. Rushing the process can lead to smudges, streaks, or other imperfections that can mar your hard work.
Spray painting your house interior can transform your space, breathing new life into your home. It’s a project that requires preparation, patience, and care, but the result is a beautifully painted interior that reflects your style and personality. So arm yourself with the right tools, knowledge, and a can-do attitude, and get ready to make a splash with spray paint!

Leave a Reply