If you intend on painting your ceiling, keep reading as we will be talking about the ceiling painting tools and how you can use them.
Painting your ceiling can be a challenge. So it would make sense to have the right tools in hand. Especially when you want to get the job done safely and without having to climb too high.
Contents
Related Article – Best Spray Painter for Ceilings
Gone are the days where Michaelangelo had to do things the old-fashioned way when painting the ceiling of a chapel. We now live in a world where tools can get the job done a bit easier. Granted, we won’t be painting pictures, but rather the color of your choice.
Whether it’s a living room, a bedroom, or anywhere else in your house, painting a ceiling can be an enjoyable project. If painting a ceiling is in your plans, obviously, it starts with buying the right tools.
Before we discuss which tools you need, we’re going to talk about why painting your ceiling is important.
Why is Painting Your Ceiling Important?

There are a few reasons why painting your ceiling is always a good idea, especially when you are doing it with a color of your choice.
For one, you want to choose a color that will make the room look larger or a bit more intimate. If the room is large in size, you could get away with a darker color. Yes, white seems to be the default color, but it doesn’t have to be.
Many people like a more sophisticated look for their ceiling, depending on which room they’re painting. For this reason, you’ll want to use the same color paint on your ceiling as you would the walls. One thing we would suggest you do is to paint the trim white, so the colors break up.
Also, painting your ceiling will give it more detail. At the same time, it will also allow more attention to be drawn towards it rather than away from it. If that’s what you are aiming for, go with a brighter color.
It doesn’t matter which color you paint your ceiling. It has its advantages. You could paint it a darker color to emphasize the trim in your room or make it look lower than it is in height.
Just because most ceilings you see are white doesn’t mean it’s the universal rule that needs to be followed. Sometimes, it can be painted a different color to bring out the best in your decor.
Buyer’s Guide: What to Consider Before Buying Ceiling Painting Tools
Before we unveil the ceiling painting tools you need, it is important to know what to look for when buying them. So we’re putting together this buyer’s guide to help make the purchasing process a lot easier.
These are basically just common features and specs to look for whenever you are searching for a painting tool. With that said, let’s take a look at what you need to pay attention to:
Price
The price will clearly be something to look at if you are on a budget. You might not care as much if you have plenty of money to spend.
The price of a product and its quality may go together. Cheap may mean decent quality, while expensive means better. That rule of thumb may not always apply as some products that are lower in price than higher-end ones can prove their worth better in the area of quality.
Regardless, find the best quality possible that fits within your budget.
Intent and Purpose
When choosing a tool, you need to know what it’s used for. For example, the intent of a pole extension tool is clear. If you are using a roller, it will be used to give you plenty of reach between the ceiling and you (standing on a ladder).
However, if you are close enough to the ceiling, it may be pointless to use it. Just know why you need the tool and how it can work to your advantage when you purchase it. Some tools may not be needed depending on certain factors.
Shape and Size
Ceiling painting tools come in different shapes and sizes. So it would make sense to decide on the ones that will give you the best advantage. For example, if you need to work on tight corners, you may consider something like a triangular paint edging tool.
Otherwise, a small rectangular edging tool may be sufficient enough. Don’t forget that you also have different-sized rollers and brushes to use as well. Decide on what you can get for tools based on the ceiling area you are painting.
You may find that larger tools can give you a great coverage area. That alone can also lead to quicker finishing times.
Ceiling Painting Tools You Need and How They are Used
The following is a list of ceiling painting tools that you’ll need. We’ll also talk about how you can use them.
Whether you are new to this or have some painting experience under your belt, it’s important to know the purpose of these tools and how they are used. This will also give you a bit more of a professional edge compared to others.
With that said, let’s go right down the list:
Paint Edging Tool
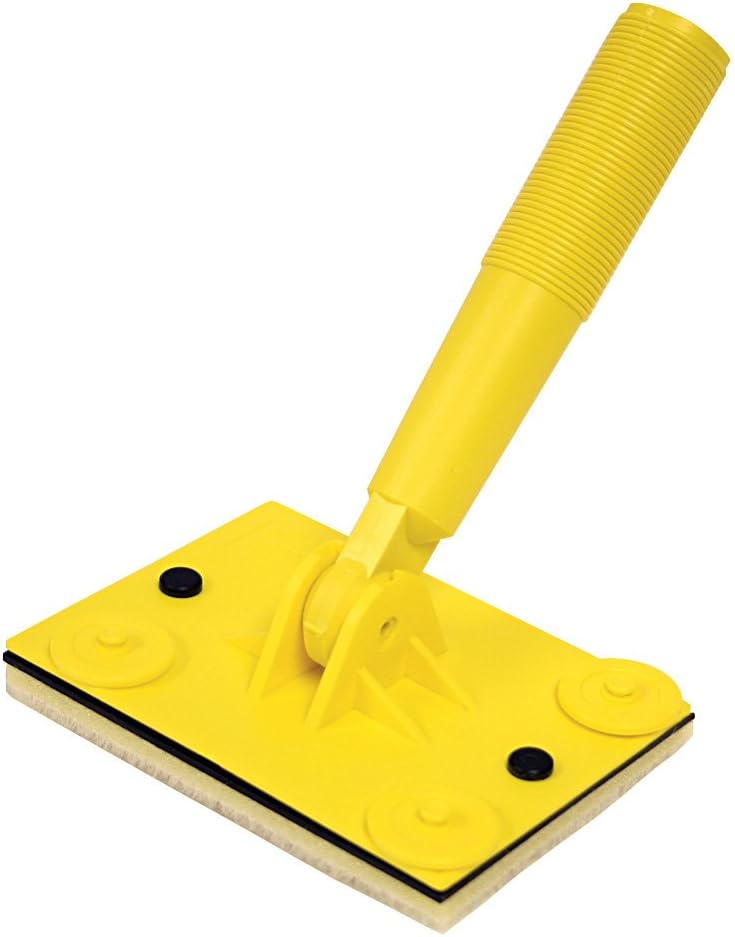
The first on the list is a paint edging tool. This is designed to help you paint alongside the areas where the wall meets the ceiling or baseboard.
The average paint edging tool is small, has a handle and small wheels. The wheels help you guide the tool along to ensure a smooth movement. Meanwhile, it prevents any paint from going over the edges.
Let the wheels rest on the trim or any place necessary so the edges can be painted properly. Just dip the paint onto the pad, scrape off the excess on the edge of the tray, and run it through the wall.
This is typically a good substitute for those who typically use painter’s tape. Painter’s tape does allow you to keep the trim, moldings, and other parts protected from overpainting. But if you can get the hang of a paint edging tool, painter’s tools may not be needed.
There are plenty of paint edger tools on the market. However, if you are painting a ceiling, you may need one that requires a connection for an extending pole. One that we recommend is the Mr. LongArm Trim Smart Paint Edger.
Extendable Pole

Whether it’s for a paint edger or a roller, there’s an extendable pole that you can use. In this section, we’ll recommend poles for each.
Having an extendable pole that will reach out to a certain length is key. You may not reach the ceiling as easily if you are on top of the ladder. Some extendable poles can be at 3 feet max, and some may go longer than that.
One of our favorite extendable poles is telescopic, meaning it can extend to certain lengths until it reaches the maximum.
There are two poles that we will recommend here. For rollers, we suggest going for the Extend-A-Reach 7-24 Long Telescopic Extension Pole. Otherwise, go with the Mr. Long Arm Pro Extension Pole, available in different lengths (minimum and maximum).
The latter should be a good choice if you are planning on using a paint edging tool that allows for pole connectivity.
Paint Roller
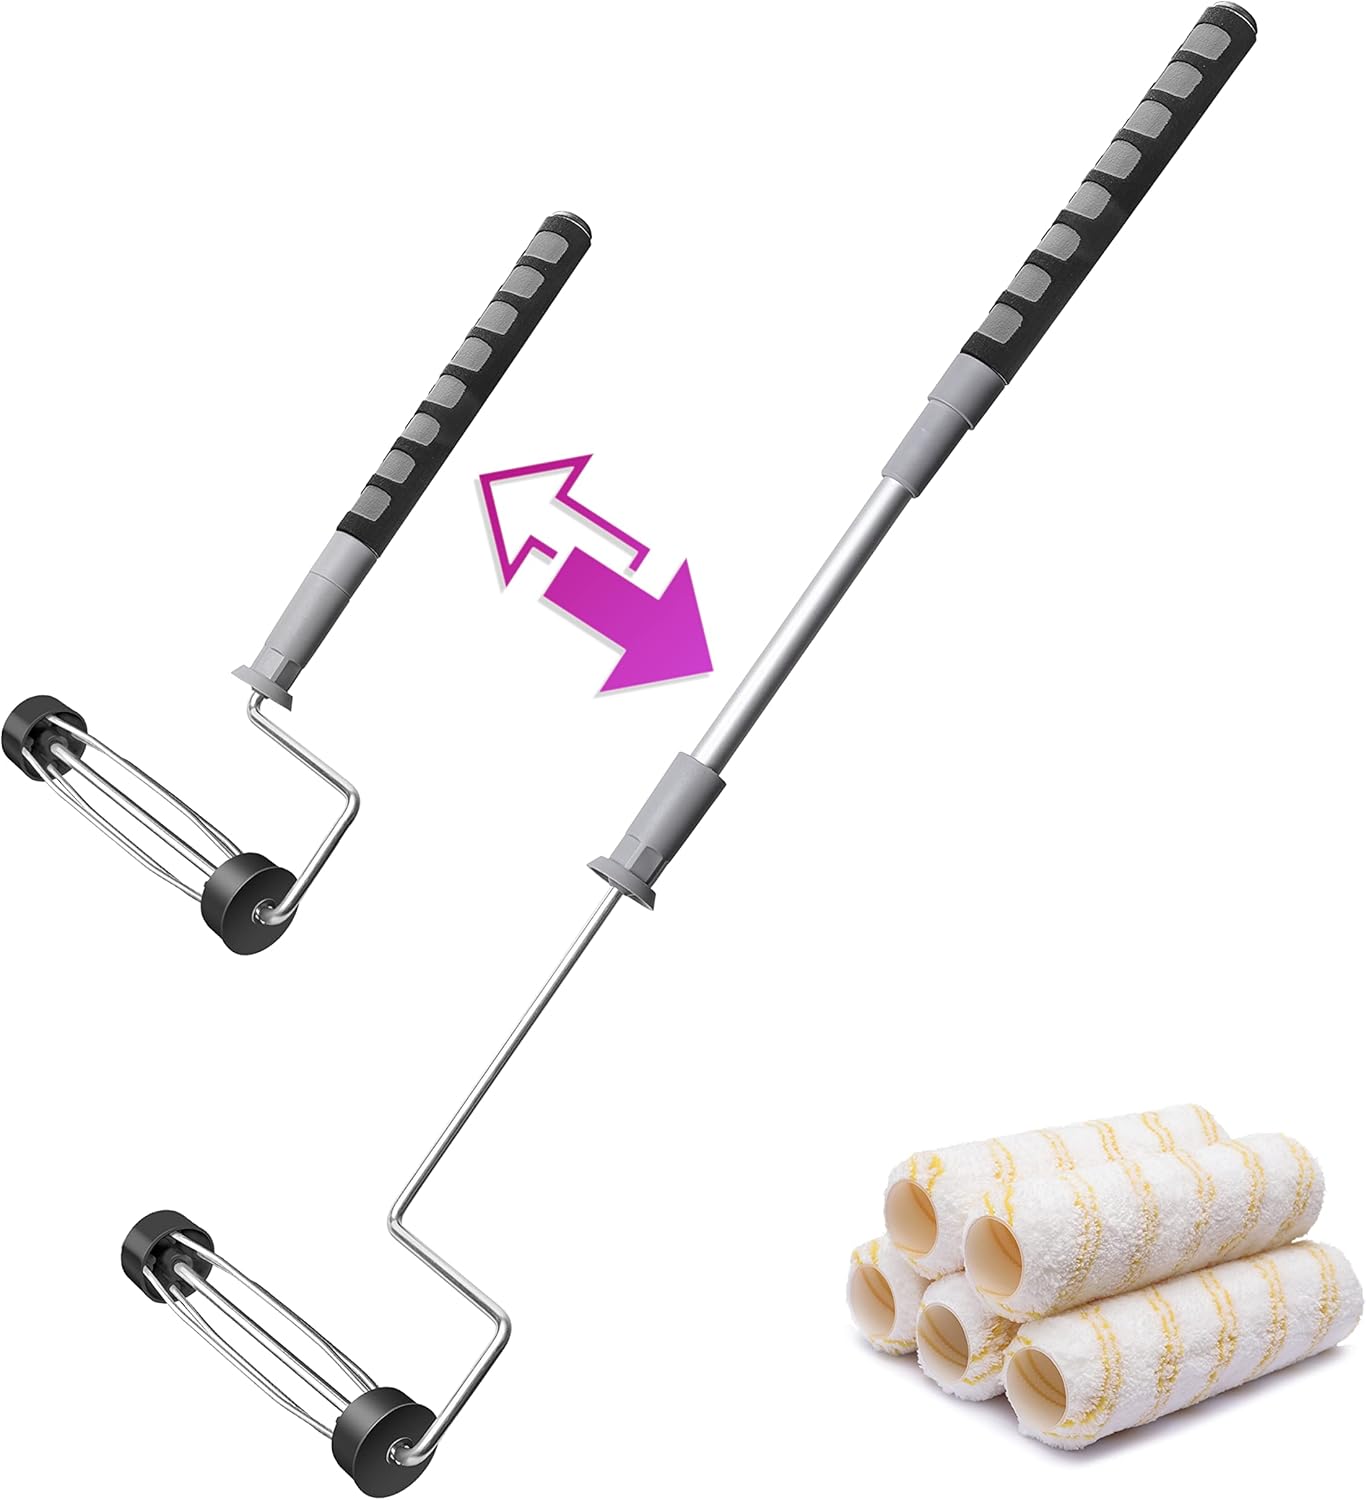
Nine times out of ten, you’ll probably be using a paint roller. A roller will leave fewer imperfections, and you won’t miss a ton of spots. Plus, you get excellent coverage compared to a flat angled brush.
We can say for certain that a paint roller has been a saving grace for painting ceilings. It saves people time and frustration. With the coverage area it gives, you wouldn’t want to do it any other way.
If you want to kill two birds with one stone, we highly suggest getting the Pinstone House Paint Roller Kit. It contains five microfiber paint rollers and a pole that extends out to about 36 inches. This will give you the best bang for your buck if you are on a budget.
Painter’s Tape

If you are new to the concept of painting, this may be your best friend here to start out. A paint edger may take some time to master, and that’s OK. In the meantime, you may want to use painter’s tape to cover the edges and fixtures.
If you want to look for a good painter’s tape, we would suggest you go with the Scotch Blue Painter’s Tape. It works well and really helps to keep within the lines.
It’s easy to set up and tear down. You can also use it when you don’t feel like using a paint edging tool.
If you are painting the ceiling for the first time, use painter’s tape.
Paint Brushes

Of course, you can’t go wrong with paint brushes. However, we’d encourage you to get a mix of flat and angled brushes. Also, getting them in different sizes should also be worth considering.
Rather than hunt down one brush, in particular, get a mixed set of flat and angled. To make it easier on you, we’d recommend you go with the Pro Grade 5 Piece Paint Brush Set.
Angled paint brushes are great for those hard-to-reach corners. Flat brushes are obviously there just for general painting and the occasional touch-ups.
Ladder
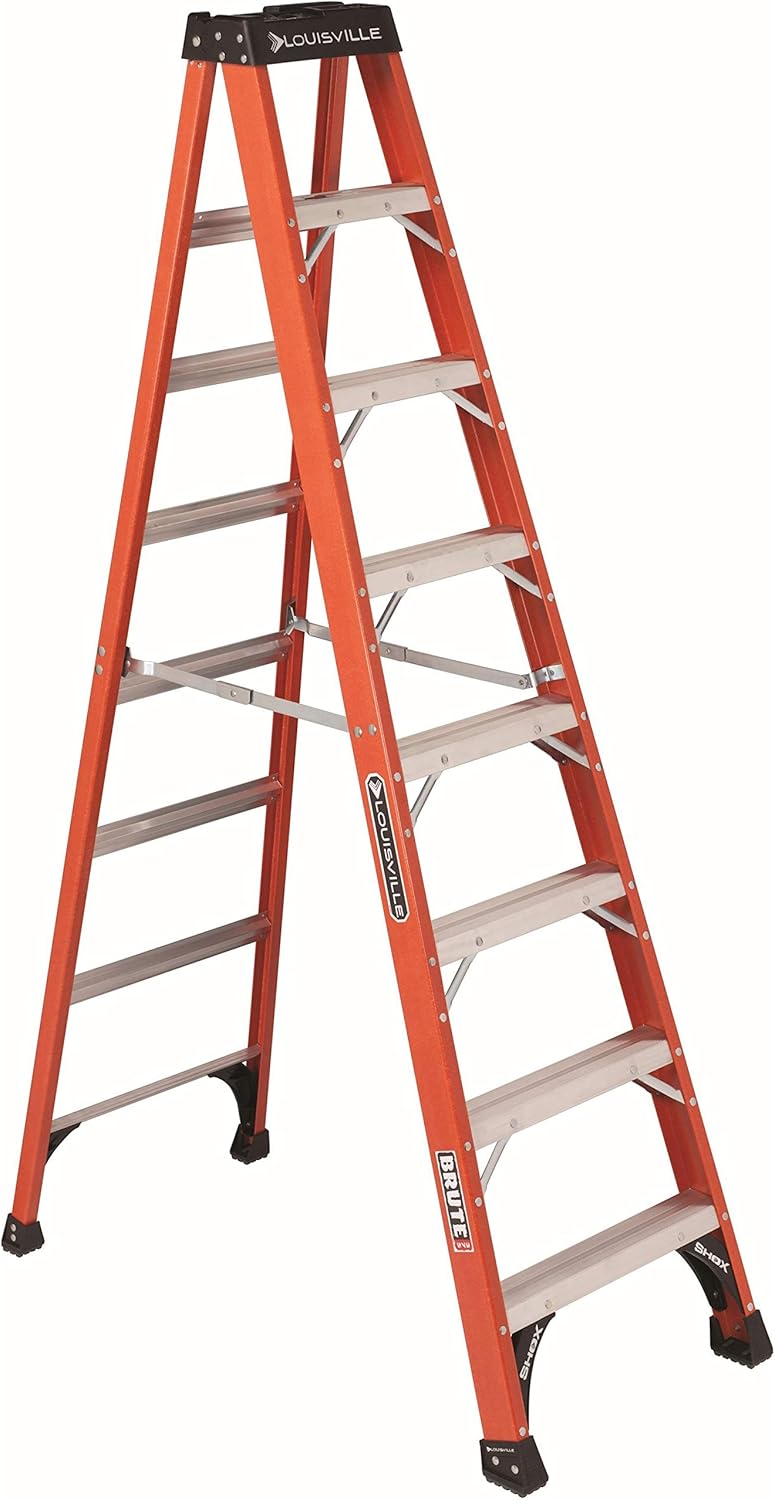
Obviously, you cannot paint a ceiling without a ladder. It’s important to find one that will be solid and sturdy. It will hold not only your body weight but also the weight of the items that you carry up.
The ladder height may make a difference. The measurement of the ceiling and how high it is from off the floor will also influence your decision on ladders.
Most importantly, choose a ladder with aluminum or fiberglass as they are two of the sturdiest materials on the market. A ladder will get you closer to the ceiling, so the work you put in will be easier.
If you need a ladder that will get the job done, we highly suggest the Louisville 8-foot Orange Step Ladder. Some ladders may be shorter and others taller.
Again, the distance between you and the ceiling should matter so you can choose the best ladder for you.
Also, Louisville has different heights starting from 4 feet at the minimum and 12 feet at the maximum. Remember, the price will change depending on which height you go with. Keep that in mind if you are on a budget for ceiling painting tools.
Conclusion
If you are looking to paint a ceiling, having the right kind of tools is key. The six tools we have listed above are must-haves. We highly suggest you purchase the ones you don’t have before painting your ceiling.
It’s always important to have a plan when you are painting your ceiling. What color are you going with? Why is the selection important?
You may have a goal in mind for when the ceiling is finished. It might look sophisticated, or it may be something that needs to be repainted after a long time. Either way, you may have a vision that will come to reality, and it may start by painting the ceiling.
Make sure that you have the right tools. You may find a roller a better choice than brushes, especially if you are further away from the ceiling. Otherwise, you can get by with brushes and painter’s tape if you are close to the ceiling itself.
You may also have a larger area to work with. The larger the ceiling, the more work you’ll have. Don’t let that discourage you. It may be an enjoyable task that may soon turn out to be the best paint job you’ve done so far.


Leave a Reply