Contents
- 1
- 2 How To Seam a Carpet with A Heat Gun? Follow These Instructions
- 2.1 The Materials That You’ll Need
- 2.1.1 The Hot Melting Method
- 2.1.1.1 Step 1 – The whole procedure is as follows.
- 2.1.1.2 Step 2 – Set the heat limiter on the heat gun to the lowest setting. Doing this will result in a complete melting of the glue.
- 2.1.1.3 Step 3 – Spread the carpet longitudinally to eliminate buckling and sloppiness, then secure the tightness with ‘stay tacks.
- 2.1.1.4 Step 4 – Place the tape in the middle of the seam’s two corners. Put a heatproof weight on the adhesive and beneath the carpet. Check that the heat shielding is in place.
- 2.1.1.5 Step 5 – Slowly move the heat gun in the carpet seams location at a rate of around 500 mm per minute. As you proceed, readjust the carpet seam just beneath where you want it to end before the glue cools.
- 2.1.1.6 Step 6 – Using a plank, push the edges into the sealant. Doing this will also aid in flattening the seams.
- 2.1.1.7 Step 7 – Cut the stay tacks and snip the excess yarns from the seams.
- 2.1.1.8 Step 8 – Roll the seam using a spiky roller if the carpeting has a loose build. If it’s a pile carpet, you should ideally use a cut pile roller to avoid damaging the fiber.
- 2.1.1 The Hot Melting Method
- 2.2 Important Tips
- 2.3 FAQ’S
- 2.4 Conclusion
- 2.1 The Materials That You’ll Need

How To Seam a Carpet with A Heat Gun? Follow These Instructions
Carpeting adds comfort, beauty, and aesthetic beauty to your house. It comes in many shapes and colors, and it may range from practical to exquisite in appearance.
Carpet seams may occasionally be a source of contention. There is a solution for every problem, including exposed seams, visible edges, or ragged lap joints.
It is not hard to heat seam carpet; you need to take your time and do it correctly.
Ideally, you would want to reduce the appearance of any carpet seams in the area by positioning them away from the primary sources of light, such as the windows.
The Materials That You’ll Need
To cut clean lines along your carpet, you’ll use a sharp blade, a carton knife, or a strong scalpel. You won’t have to trim your mat if it comes with edges.
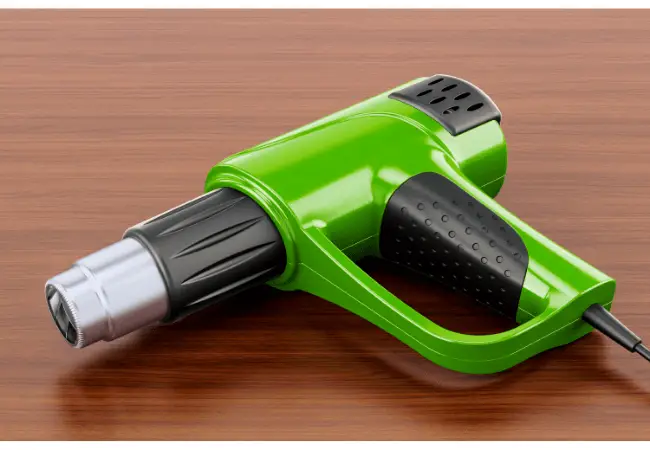
You’ll also require a carpet seam adhesive, a heat gun, a heatproof shielding material and a rolling pin to push the carpets into the glue.
The Hot Melting Method
A hot melt seaming method is generally used to join two carpet seams. Hot melt seaming tapes is a type of adhesive that has a silicone sheet base. It is best suited for sticking and double bond applications.
A specific gear known as a hot melt seam sealing device is required to seam a carpet using hot tape. A standard heat gun, on the other hand, can also suffice for settling tiny rugs together.
It is perfect for seaming huge carpets together. The best part is that it is readily available at your local home remodeling shop in a lot of variety.
-
Step 1 – The whole procedure is as follows.
-
Step 2 – Set the heat limiter on the heat gun to the lowest setting. Doing this will result in a complete melting of the glue.
-
Step 3 – Spread the carpet longitudinally to eliminate buckling and sloppiness, then secure the tightness with ‘stay tacks.
-
Step 4 – Place the tape in the middle of the seam’s two corners. Put a heatproof weight on the adhesive and beneath the carpet. Check that the heat shielding is in place.
-
Step 5 – Slowly move the heat gun in the carpet seams location at a rate of around 500 mm per minute. As you proceed, readjust the carpet seam just beneath where you want it to end before the glue cools.
-
Step 6 – Using a plank, push the edges into the sealant. Doing this will also aid in flattening the seams.
-
Step 7 – Cut the stay tacks and snip the excess yarns from the seams.
-
Step 8 – Roll the seam using a spiky roller if the carpeting has a loose build. If it’s a pile carpet, you should ideally use a cut pile roller to avoid damaging the fiber.
There could be some swelling on the carpet after stretching the seams.
Even looped pile carpet has more seams than pile carpet. It should be noted that more oversized carpets tend to peak higher than lighter carpets.
You may reduce peaking by pulling the carpet tightly along the seams and gently across the seams.
Important Tips
Ensure that your carpet borders are level – the edges must push up against one other smoothly.
Take a piece of carpet seam tape to match the stretch of the seam. Place the tape so that it is centered under the carpet seam. Make sure the sticky side of the tape is facing up.
Apply the heat gun on the tape to warm it up. When the tape has been heated, push the carpet down so that the seams stick together on the adhesive. Roll out your carpet using a rolling pin to get ideally even carpet seams.
FAQ’S
-
Does my carpet need to be seamed before I can stretch it?
Before seaming, it is usually suggested that you seal the seams. Use hot-melt tape to sew a small piece of carpet, then stretch it by hand over a level surface. When you test the sample portions, it should give you a fair idea about whether the seam will peek back or not.
-
How to make proper Seams on Your Carpet?
Ensure that the top of the carpeting on both sections is facing the same way before inserting the seam tape.
Cut the carpeting seam adhesive to the width of the cut seams and position it between the two cut edges, adhesive side up. The seam adhesive is usually labelled to help you identify.
-
Can I repair My Carpet Seams?
Re-gluing or seam patching the problematic part of your carpet is the most straightforward approach for basic repairs such as little peaking and broken seams.
Apply a substantial amount of carpeting glue beneath the carpet’s edges using your glue gun for gluing. Wait for a few hours with textbooks or weights on the mended seam.
-
Where should carpet seams be placed?
In general, seams should go in the very same way as the majority of foot placement areas. The pile must sweep down stairwells.
Additional, concealed carpet must be folded back on top and end of the steps so that You may change the rug to disguise wear and tear as the foot edges deteriorate.
-
Will Carpet Seams Eventually fade?
While particular carpets disguise seams better than others, it is crucial to remember that seams will never be completely hidden.
On the other hand, a professional carpet installer would be capable of hiding it properly.
Based on the scale and usage of space, you can select carpets with fewer visible seams.
Conclusion
When seaming carpets, an often-overlooked general rule is as easy and crucial. Always read the manufacturer’s instructions for the rug being seamed and the seam adhesive being used.
Reading instructions before seaming is vital since carpet, stitches, and seam adhesive does not exist in one size with universal fitting.
Do your research before seaming, and most importantly, always use safety gear.
Related Article
Best Heat Gun for Paint Removal


Leave a Reply