When my paint sprayer gets clogged with dried latex paint, it can stop working and make it hard to get a smooth finish on any project. To clean dried latex paint from a paint sprayer, I need to take apart the main parts, soak them in warm water or a suitable cleaning solution, and scrub off any buildup before rinsing and reassembling. This step keeps my sprayer running well and helps prevent future clogging.
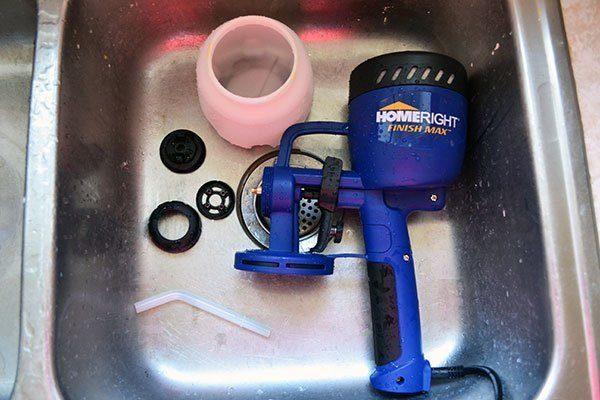
It’s important to clean a sprayer as soon as possible after using latex paint because dried paint can be tough to remove if left for too long. Clear steps make the job simple and stop my sprayer from becoming damaged over time. I want every project to run smoothly, so I always make sure my tools are ready for next time.
Contents
Understanding Latex Paint and Paint Sprayers
Latex paint is water-based and popular for its fast drying time. Paint sprayers are designed to deliver a smooth, even coat but are sensitive to paint buildup, especially when paint dries inside the machine.
Characteristics of Dried Latex Paint
Dried latex paint forms a solid, rubbery layer that can stick to most surfaces. Because it is water-based, it sets up quickly. Once dry, it becomes much harder to remove than wet paint.
When latex paint dries, the resin and pigments form a thin skin. If this skin builds up inside a sprayer, it can block the nozzle, hose, or filters. Dried paint can also clog small parts, making cleaning and maintenance more difficult.
Latex paint sticks tightly to metal, plastic, and rubber parts inside the sprayer. Removing dried paint often requires soaking and gentle scrubbing. Using the wrong cleaner , such as solvents meant for oil-based paints , can damage parts of the sprayer. Warm, soapy water works best for most dried latex paint, but stubborn spots may need specialized products.
How Paint Sprayers Function
A paint sprayer uses compressed air or high pressure to push paint through a tiny nozzle. This turns the paint into a fine mist that evenly covers surfaces. There are several types of sprayers, including airless and HVLP (High Volume, Low Pressure), but they all push paint through small passages inside the machine.
The paint travels from a container or reservoir, through a hose, and out of the nozzle. This means any blockage from dried paint can quickly stop the flow. Even a thin layer of dried latex paint can affect the spray pattern and cause splattering.
It’s important that all parts — including the gun, hose, filters, and nozzle — are kept free of dried paint. Regular cleaning stops clogs and helps the sprayer work correctly every time I use it. Missing even a small spot of dried paint can cause problems with the next job.
Essential Preparation Before Cleaning
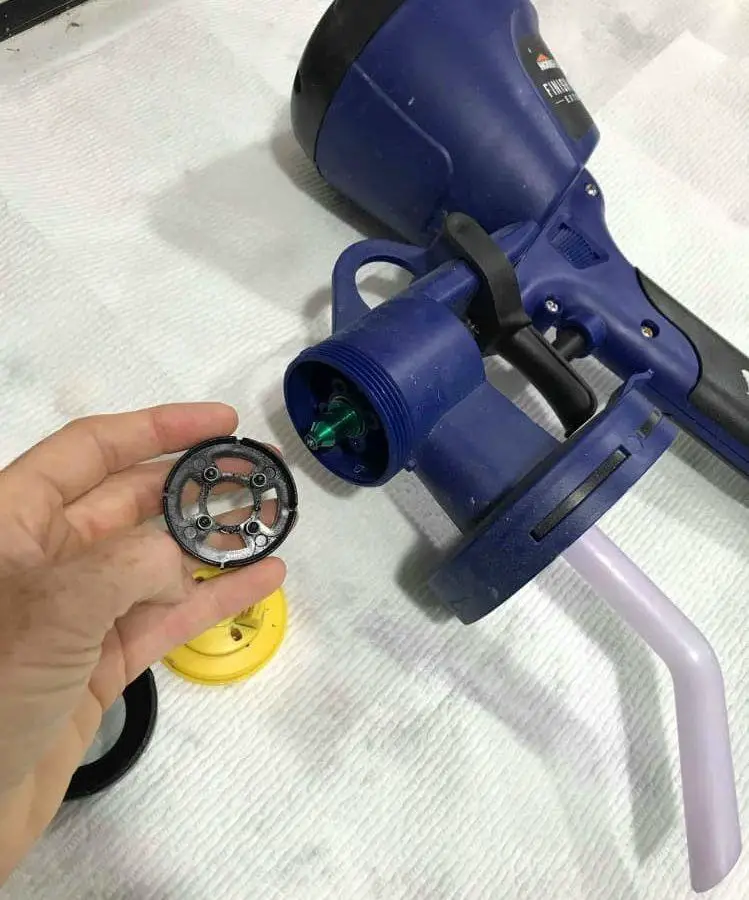
I need to prepare my work area and make sure I have the right tools before I start cleaning dried latex paint from a paint sprayer. Careful setup helps avoid accidents and makes the cleaning process smoother and safer.
Gathering the Necessary Supplies
Having the correct supplies ready saves time and keeps the process organized. To clean latex paint, I need the following items:
- A bucket or container for soaking parts
- Clean water and, if available, warm water for better paint removal
- Soft brushes (like old toothbrushes) for scrubbing
- Rags or sponges for wiping surfaces
- Needle or thin wire for clearing spray tips
- Protective gloves to avoid skin contact with paint or cleaners
Optional Supplies:
- Paint sprayer cleaning solution (check the label for latex paint suitability)
- Safety glasses for eye protection
- Small tools (like wrenches) for taking apart the sprayer
Laying out all the tools and supplies in one spot helps me avoid searching for items mid-task. I check that everything is clean and in good condition before I begin.
Ensuring Safety and Proper Ventilation
Working safely is important, especially when dealing with old or dried paint. I always wear gloves to protect my hands from paint chemicals and sharp edges. I also put on safety glasses if I’m scrubbing or using cleaning solutions.
Good ventilation prevents the buildup of paint fumes, even when cleaning dried latex paint. I open windows and doors or use a fan to keep fresh air moving. If I work indoors, I set up in a well-ventilated area away from food, pets, and children.
I make sure to read the labels of any cleaner I use. Some cleaning solutions may require extra ventilation or have specific safety instructions. By following these steps, I reduce risks and create a cleaner, safer workspace.
Step-By-Step Removal of Dried Latex Paint From Paint Sprayer
Dried latex paint can clog the internal parts of a paint sprayer, stopping it from working properly. By using the right removal steps and cleaning methods, I can restore the sprayer to good working condition.
Disassembling the Paint Sprayer
First, I unplug or disconnect the sprayer from any power or air supply for safety. I place all my tools and supplies on a flat surface nearby. Using the manual as a guide, I take apart the main components—such as the spray tip, guard, paint container, and filter.
I lay each part out in order, making sure not to lose small pieces like seals or screws. Organizing the parts helps during reassembly. If I run into resistance or cannot remove a part, I check the manual again for hidden locks or clips.
I avoid using too much force that might break plastic threads or fittings. If the unit has a hose, I detach it from the main body. Once apart, I gently tap each part to remove loose paint chips or debris.
Soaking and Softening Dried Paint
Next, I fill a bucket or container with warm, soapy water. For stubborn dried latex paint, I sometimes use a mix of water and a safe paint remover recommended in the manual. I submerge metal and plastic parts, except for electrical components.
I let these parts soak for at least 30 minutes. This softens the dried paint, making it easier to clean later. For smaller items like nozzles and filters, I place them in separate cups or trays.
If any parts shouldn’t be soaked, like gaskets or rubber seals, I set them aside. I wear gloves to protect my hands from harsh cleaners. After soaking, I check to see if the paint is loosening up or if more soaking is needed.
Manual Cleaning Techniques
After softening, I use a soft brush, toothbrush, or small cleaning tool to scrub away the paint. I work gently to avoid scratching plastic or damaging small openings in the nozzle and filter. For clogged spray tips, I use a toothpick or a thin wire to clear blockages.
If paint remains inside tubes or narrow parts, I run water through them or use cleaning brushes designed for paint sprayers. I avoid forcing sharp objects into small holes, as this can deform parts and affect spray patterns.
For really stubborn spots, I may repeat the soaking and scrubbing. Once clean, I rinse off all parts with clean water and wipe them dry with a lint-free cloth.
Reassembling and Testing the Sprayer
I dry every part completely before putting the sprayer back together. Carefully, I reverse the disassembly steps, making sure each part fits snugly and any seals or filters are placed correctly. I tighten screws by hand first, then use tools just enough to secure them without over-tightening.
When the sprayer is reassembled, I run warm water or a small amount of paint thinner through it to check for any remaining clogs. I watch the spray pattern to be sure it is even and consistent.
If I see any leaks, I stop and recheck gaskets and connections. Once I’m sure everything works, the sprayer is ready for its next use.
Solutions for Stubborn or Hard-To-Reach Areas
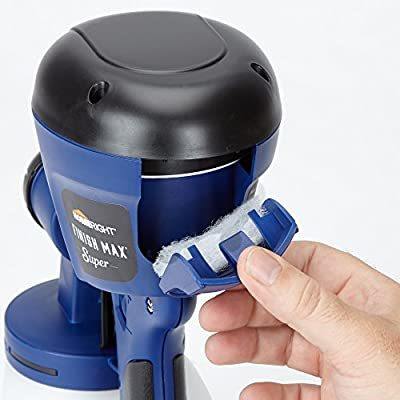
When dried latex paint clogs hard-to-reach sections of my paint sprayer, simple rinsing does not work. I need special tools or strong cleaners to clear out stubborn spots and small passages.
Using Specialized Cleaning Tools
I use special brushes and picks designed for paint sprayers to break up dried paint in tight sections. For example, a nylon brush can reach into small tubes and nozzles without scraping them. I also use a thin wire or a flexible cleaning needle for very narrow spots.
Sometimes, I work with small sponges or cleaning swabs to reach inside smaller crevices. Toothpicks or cotton swabs help scrub unreachable corners if I do not have special gear nearby.
Below is a quick list of helpful tools:
- Bottle or tube cleaning brushes
- Flexible wire or cleaning needles
- Cleaning swabs or pipe cleaners
- Toothpicks or soft-bristle toothbrushes
I always use tools carefully, as forcing them can damage the sprayer parts. After scrubbing, I rinse every area with clean water to flush out any loosened paint debris.
Applying Commercial Paint Removers
When dried latex paint will not budge, I use a commercial paint remover or cleaning solution made for sprayers. Most removers come as a spray or soak that dissolves paint inside small parts and passageways.
First, I follow the manufacturer’s instructions for safety and correct use. Usually, I detach the blocked section, then apply the remover and let it sit for the time listed on the label.
If needed, I use a brush or swab to help the remover break down stuck paint. I repeat the process for heavily clogged spots.
After treating with paint remover, I always rinse parts well with clean water to remove any chemicals before reassembling the sprayer. This prevents lingering remover from affecting my next paint job or damaging internal parts.
Preventing Future Paint Buildup
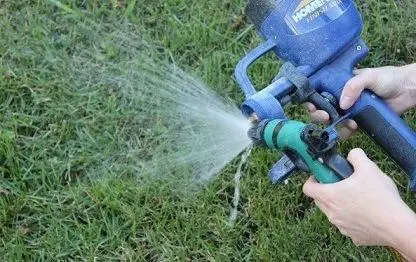
Maintaining my paint sprayer in good condition helps avoid time-consuming clogs and allows for smoother projects. Taking steps to clean the equipment and use the right habits is key to keeping it ready for use.
Regular Maintenance Tips
I check the spray tip, filters, and hoses for leftover paint before every use. If I spot any dried residue, I use a small brush or appropriate cleaning solution to remove it.
I also keep a maintenance log that details each cleaning and part replacement. This helps me track when deeper cleaning or repairs are needed.
Once a month, I inspect the gaskets and seals. If they are worn or cracked, I replace them to prevent leaks and buildup.
Here’s a quick list of my main tasks:
| Task | Frequency |
|---|---|
| Inspect the spray tip | Every use |
| Clean filters | Every use |
| Deep clean the entire unit | Monthly |
| Replace gaskets/seals | As needed |
Sticking to this routine keeps paint from building up in hard-to-reach places and speeds up all future cleanups.
Proper Cleaning After Each Use
After each painting session, I immediately run clean water or the proper cleaning solution through my sprayer. This flushes out any latex paint before it can dry inside the machine.
I remove the spray tip and filter, soaking both in warm, soapy water for about 15 minutes. Using a soft-bristled brush, I scrub away any remaining paint.
Once the sprayer and its parts are clean, I wipe them down with a dry cloth to prevent moisture from causing rust or mold.
If I used the sprayer for more than an hour, I would repeat the flushing process until the water runs completely clear. This simple routine prevents buildup and keeps my paint sprayer in top working shape for the next time I need it.



Leave a Reply