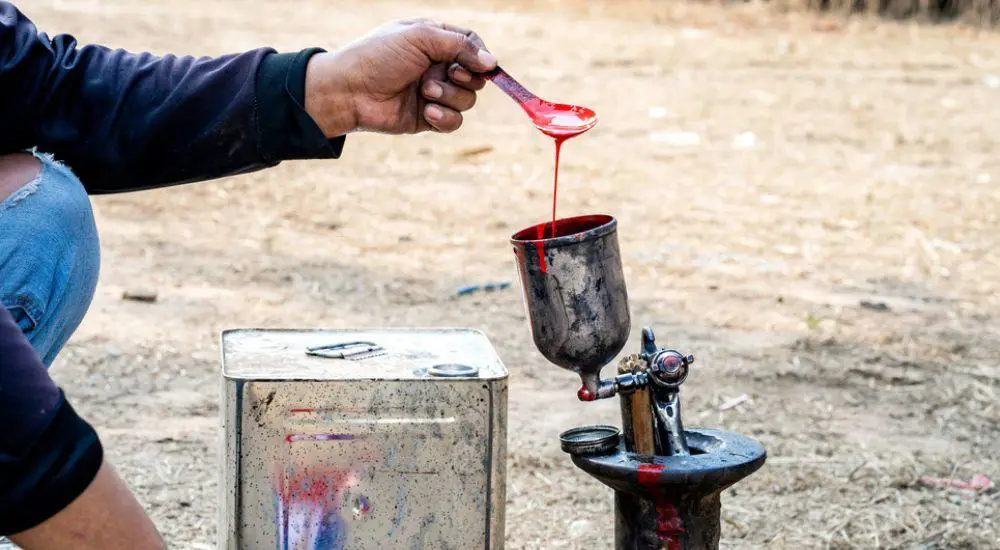
Spray painting has revolutionized the way we approach surface finishing in a variety of sectors, including automotive, furniture, and home improvement projects. The use of spray guns has brought about a significant leap in efficiency and precision, offering a level of uniformity and speed that traditional brush painting methods cannot match. This advancement has made it increasingly important for professionals and DIY enthusiasts alike to master the art of using a spray gun effectively. However, the key to a perfect spray paint job isn’t just in the technique of application; it begins much earlier, with the preparation of the paint itself.
Central to this preparation is the topic of “properly mix paint for a spray gun.” Achieving the perfect paint mix is not just a matter of aesthetics but a critical step in ensuring the longevity and quality of the paint job. The challenges here are manifold – selecting the right type of paint, understanding the nuances of thinners, and most importantly, mastering the art of achieving the correct viscosity. These are crucial to prevent common issues such as clogging, uneven spray patterns, or poor adhesion. This part of the process, often overlooked, is where the magic truly happens in any spray painting project.
So, how does one properly mix paint for a spray gun? The answer lies in understanding the basic principles: knowing the appropriate paint-to-thinner ratio for the specific paint and gun being used, meticulously measuring these components, and ensuring thorough mixing to achieve a consistent blend. Different paints – oil-based, latex, acrylic – each have their unique requirements and challenges. The subsequent sections of this article will dive into these aspects, offering a step-by-step guide to demystify the process. From the choice of materials to the final stir, each step is pivotal in ensuring that your spray gun not only performs optimally but also delivers a finish that meets professional standards.
Regardless of whether you prefer DIY or you are a professional painter, getting the correct mixture of paint is inevitable if you are to get some amazing painting results. The smoothness and color of your painting project will depend on how well you mix your paint. Fortunately, the procedure of paint mixing is not at all a hard one. For over a decade, I have been actively involved in so many painting projects and I can tell you there are a lot of other complex things in the industry than mixing paint for a spray gun.
However, I do not want to leave anything to chance so I am going to provide you with 7 steps to properly mix paint for a spray gun through this article.

Contents
1. Preparation
Just as is the case with many other things in life, the preparation stage when mixing paint for a spray gun is very important. To have that mixture that easily flows through the nozzle, you must have all the tools and materials needed to facilitate the process. For most painting jobs, you will need some basic painting tools/requirements and materials such as water, paint sprayer, paint strainer, thinner, face mask, sprayer tips, test board, and safety goggles.
It is also at the preparation stage that you get to pick your desired type of paint depending on your project and the color that you want to achieve. In most cases, the paints’ manufacturers will indicate how each paint is used so be careful to read the guides before signing up for anything. Some of the most common paints include latex paints and oil-based paints.
Finally, you should always make sure that your working space is free from dust, dirt, and other particles that may fall into your paint mixture and cause complications.
2. Put on Protective Gears
Mixing paint is a lot riskier than it sounds on paper. For that reason, it is important to put on your protective gear before starting the procedure. These gears include (but are not limited to) goggles, gloves, and face masks. As their name suggests, protective gears are meant to protect your body from injuries and chemical reactions that may occur when mixing the paint for a spray gun. For instance, oil-based paints are known to produce toxic fumes that can only be prevented from reaching your lungs through the use of a face mask.
3. Paint Straining
In most cases, when you purchase paint, most of the contents will have settled at the bottom of the container. The paint forms lumps in this state that may clog the spray gun if not properly strained. To go around this, pour the contents in the container into a strainer and throw away the residues on the filter. You will then use the filtered paint to paint without fear of clogging or inconsistent flow.
4. Taste the Paint
Straining the paint alone is not a guarantee that you have the perfect ingredients for a perfect mixture. Use a test board to ascertain that you bought the right quality of paint and that it is suitable for your project. Simply take a small amount of paint and spray on a test board then observe the quality of the application and the consistency. Good paint should easily flow onto the surface evenly with the right consistency while highlighting the expected color.
However, if the paint does not flow naturally and displays a slightly different color from the one indicated in the manual, you might have to mix it with a thinner for better results. remember, it is not always that you have to mix the paint with the thinner and the decision you make entirely depends on your judgment of the paint after straining.
5. Mix the Paint
After putting on the right gears, straining the paint, and testing it to ensure that it is fit for your project, the next step is mixing the paint for a spray gun. First, take a bucket and pour your paint (the amount depends on how your painting project is). Depending on the type of paint you choose, you should add water, thinner, or any other suitable chemical in small amounts as you proceed. Again, there is no specific amount of water, thinner, or chemicals that you are supposed to add to your paint.
Everything at this stage depends on your judgment and how consistent you want the mixture to be. However, in my experience, I have discovered that the rule of thumb is to add a quarter cup of water for every single gallon of paint. For oil-based paints, begin with adding a small amount of thinner until you get your desired consistency.
6. Test the Mixture
When you are certain that you have achieved your desired consistency, it is time to test the mixture to see if it suits your project. Even though many established painters ignore this stage, it is very important because it can save you from ruining the entire project especially if the mixture is not as consistent as you first thought. Simply take a small sample of the mixture and paint it on the test board then observe. If the consistency of the paint mixture is not appealing, you should go back to adding a little thinner or water depending on the instructions given.
7. Transfer the mixture to a Spray Gun
This is the final stage. After ascertaining that you have a perfect paint mixture, it is time to transfer it into the spray gun. There isn’t really a special trick or hack about this. Simply pour the mixture into the spray gun carefully and you are ready to go.
Remember to clean your spray gun once you are done painting to increase its durability and ensure that it works in top condition always.
FAQ’s
How to properly mix paint for a spray gun?
The proper way to mix paint for a spray gun depends on the type of paint you are using. Here are some general guidelines:
- Oil-based paints: Oil-based paints should be thinned with mineral spirits or paint thinner. The ratio of paint to thinner will vary depending on the paint, but a good starting point is 1:1.
- Latex paints: Latex paints should be thinned with water. The ratio of paint to water will again vary depending on the paint, but a good starting point is 2:1.
- Lacquer paints: Lacquer paints should be thinned with lacquer thinner. The ratio of paint to thinner will vary depending on the paint, but a good starting point is 1:1.
Once you have mixed the paint to the correct consistency, it is important to strain it through a fine-mesh strainer to remove any lumps or debris. This will help to ensure that the paint sprays evenly and smoothly.
How do I know if the paint is thinned enough for a spray gun?
The best way to know if the paint is thinned enough for a spray gun is to test it. Dip a paint stick into the paint and hold it up. If the paint runs off of the stick in a smooth, even stream, then it is thinned enough. If the paint drips off of the stick in globs, then it needs to be thinned more.
What happens if I don’t thin the paint enough?
If you don’t thin the paint enough, it will not spray properly. The paint will be too thick to pass through the spray gun nozzle, and it will clog the nozzle. This will prevent the paint from spraying evenly, and it will also make it difficult to control the spray.
What happens if I thin the paint too much?
If you thin the paint too much, it will be too runny. The paint will not adhere properly to the surface you are spraying, and it will run and drip. This will result in an uneven finish, and it may also make it difficult to achieve the desired color coverage.
Here are some additional tips for properly mixing paint for a spray gun:
- Always use a clean mixing container.
- Stir the paint thoroughly before using it.
- Thin the paint gradually, adding a little bit of thinner at a time.
- Test the paint on a scrap piece of material before spraying it on your project.
Conclusion
Mastering the skill of properly mixing paint for a spray gun is a crucial aspect of achieving professional-grade results in any painting project. Throughout this article, we have explored the intricacies of this process, emphasizing the importance of understanding the properties of different paints, the right selection of thinners, and the precise measurement and mixing techniques required. The journey from selecting the appropriate paint to the final execution with a spray gun is both an art and a science, one that demands attention to detail, patience, and practice.
One of the key takeaways from this discussion is the significance of the paint-to-thinner ratio. This ratio is pivotal in determining the viscosity of the paint, which in turn affects the spray gun’s performance and the quality of the finish. It’s important to remember that different paints and spray guns may require different ratios. Therefore, always refer to the manufacturer’s guidelines and start with their recommended ratio as a baseline. Experimentation and experience play a role here; don’t be afraid to adjust the ratios slightly to achieve the desired consistency, especially as you become more familiar with the behavior of specific paint types.
Another vital aspect is the choice of thinner. The type of thinner used can drastically affect the drying time, finish, and overall durability of the paint. For instance, using a fast-drying thinner in a warm environment can lead to a finish that dries too quickly, potentially causing imperfections. Conversely, a slower-drying thinner might be more suitable in such conditions. Understanding these nuances can significantly enhance the quality of your paint job.
The process of mixing itself cannot be understated. Ensuring a homogeneous mixture is essential for preventing issues such as clogging, uneven spray patterns, or color inconsistencies. Invest time in thorough stirring, and consider using mechanical mixers for larger volumes to achieve a uniform blend.
Safety is another critical component. Always mix paint in a well-ventilated area and use appropriate protective gear, such as gloves and masks, to avoid inhaling fumes or getting paint on your skin. Remember, safety should never be compromised in pursuit of the perfect finish.
Finally, practice makes perfect. The more you mix and use a spray gun, the more intuitive these processes will become. Each painting project is an opportunity to refine your technique and understand the subtleties of working with different materials and tools. Don’t be disheartened by initial challenges; instead, view them as learning experiences that contribute to your growth as a skilled painter.
In essence, properly mixing paint for a spray gun is a foundational skill for any painting project. It requires a blend of technical knowledge, practical skills, and a keen eye for detail. By adhering to the principles outlined in this article, you can ensure that your paint is perfectly prepped, leading to a smooth, even, and durable finish. Remember, the beauty of any spray-painted surface lies as much in the preparation of the paint as in the skill of application. With the right approach and a bit of practice, you can achieve results that are not just satisfactory, but truly professional.
How you mix your paint for a spray gun hugely determines whether you will be successful in your quest or otherwise. The 7 steps to properly mix paint for a spray gun provided in this article will go a long way toward ensuring that you have a mixture with the right consistency and flow.


Leave a Reply