Are you thinking of cleaning your HVLP spray gun? Well, you have come to the right place. In this step by step guide, I will walk you through the entire process of how to clean an HVLP spray gun. I will also give you a few pointers on everything you need to know about the cleaning process.
Understand that cleaning your HVLP spray gun is vital after every painting project. Proper cleaning will ensure you get long-lasting services from your spray gun. You will also get a more professional finish during your next painting project.
Luckily, cleaning your spray gun isn’t as difficult as it might seem. Well, let’s get started learning everything about cleaning an HVLP spray gun.
Contents
HVLP Spray Gun Cleaning – What You Need To Know
Cleaning your HVLP gun is quite easy once you know the right steps. However, proper cleaning will guarantee long-lasting services from an HVLP spray gun.
Never postpone cleaning your spray gun after a painting project. I know it can be rather tempting to clean your spray gun later on after a project. However, leaving paint inside your HVLP spray gun is never advisable because it will clog and stick.
It would help if you exercise caution when disassembling your spray gun. Note that your HVLP gun needs to be taken apart in a specific manner. You should also take note of where everything goes during the disassembly step.
Requirements For Cleaning Your HVLP Spray Gun
You will need a few supplies to effectively clean your paint gun. Here is an extensive list of everything you will need for the entire process.
Soapy waterPaper towels or ragsGogglesCleaning solution or paint thinnerGlovesToothpicksBristle cleaning brushGun wrenchPlastic buckets or cups
Understand that protective equipment is vital during the cleaning process. Note that you will be dealing with heavy-duty paint thinner or cleaning solution during the process. It would help if you invested in goggles and plastic gloves.
Step by Step Instructions
Step 1: Start with the Paint Cup
The paint cup needs to be cleaned out immediately after your painting project. understand that the paint cup will have the most fluid or paint than any other part of your HVLP spray gun. Fill the cup with a cleaning solution or paint thinner.
Place the cap on your paint cup and firmly shake it to loosen all the paint. You can then pull the spray gun trigger and let the cleaning solution empty into a bucket or plastic cup. Note that doing this will ensure that the cleaning solution or paint thinner works through all the individual parts of your HVLP paint gun.
Use a paper towel to clean the main body of your spray gun. Dip the paper towel in a little bit of paint thinner and run it through the cup. Ensure you use your gloves during this step to avoid getting the cleaning solution or paint thinner on your skin.
Step 2: Disassemble your HVLP Spray Gun
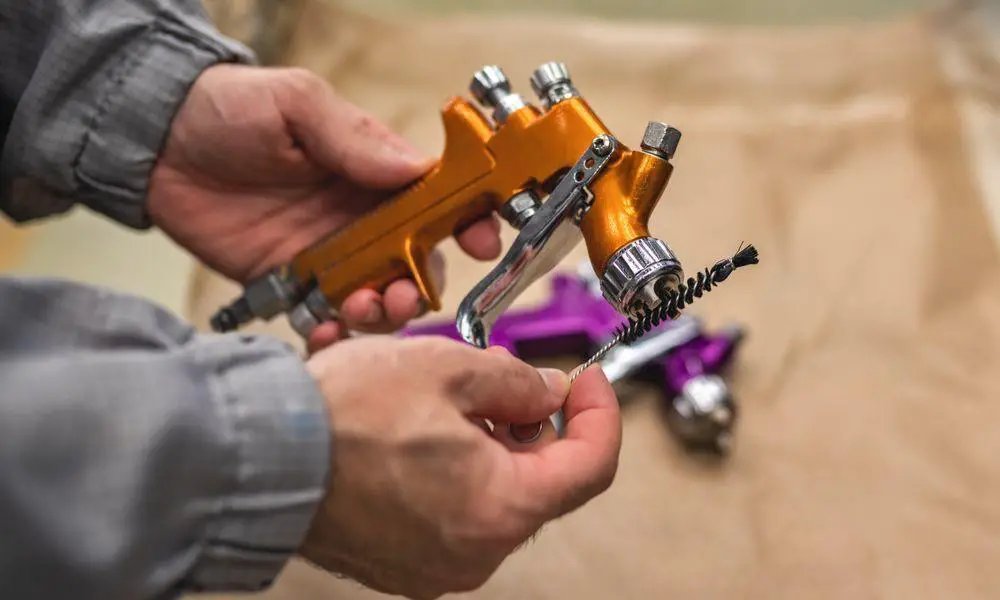
Start by unscrewing the body of your gun from the paint cup. Set aside the cup on a piece of paper towel to dry. You can then start disassembling the body of your spray gun. It would help if you started by removing the air cap.
Exercise a lot of caution when unscrewing the needle. Note that your needle is spring-loaded and it may shoot off and get lost. Hold the needle in place and slowly unscrew it to avoid any incidents.
Your spray gun probably came with a wrench during purchase. Use this wrench to unscrew the intricate inner parts of your air cap. Set aside all the small parts so that you can clean them separately. Note that the smaller gun parts can easily get misplaced.
Step 3: Submerge the Small Parts in Paint Thinner
We now need to clean all the small parts after disassembling. Note that we recommend using a high-quality paint thinner during the step. However, you could always use a standard cleaning solution depending on your preference.
The vital part of this entire step is to ensure that you take good care of all these small parts. Do not damage or misplace them during the entire cleaning process. You can clean the small parts using an old toothbrush.
Step 4: Clean the Main body
You can now proceed to place the main body of your HVLP spray gun in a bucket filled with paint thinner. Allow it to soak for a few minutes to remove all the paint residue. You will find it quite easy to clean once all the paint residue is properly broken down.
Step 5: Thoroughly Wipe Everything
You now need to remove everything from the cleaning solution. Ensure that you let all the parts soak for about 10 minutes to half an hour. Use a paper towel or rag to wipe everything with a little bit of paint thinner or soapy water.
Understand that the small parts such as the needle and spring have to be handled properly during this step. You don’t want to bend or break these small parts because replacement can be a huge nightmare.
Step 6: Reassemble Your Gun
The final step is reassembling your HVLP spray gun after all the parts are thoroughly cleaned. Start by placing the spring and needle back to their respective slots. You then need to screw on the inner air cap before the outer air cap. Put your paint cup on the HVLP spray gun body and place the cap.
Final words
Cleaning your HVLP spray gun is rather simple and straightforward if you follow the above step by step tutorial. Understand that you must carry out proper cleaning after every completed painting task. By doing this, it will ensure that your equipment is functioning seamlessly and gets a professional finish.
Note that the cleaning process will get easier and fast once you master all the six steps above. Soon enough, you will comfortably clean your HVLP spray gun within a few minutes. Through proper cleaning, your spray gun will get you long-lasting services.


Leave a Reply