Spray painting is a popular technique for various DIY projects, automotive work, and artistic endeavors. Its versatility and ease of use make it a preferred choice for many, offering quick, even coverage and a smooth finish. However, spray painting is not without its challenges, especially when it comes to the impact of environmental conditions on the final result. Understanding the intricacies of spray painting in different settings is crucial for achieving the desired outcome on your next paint job.
One particular challenge that often perplexes enthusiasts is “spray painting in cold weather”. Cold weather can significantly affect the quality of spray paint applications. The lower temperatures can lead to issues like improper drying, uneven texture, and undesirable finish. The reason behind these challenges lies in the nature of spray paint and how it reacts to colder temperatures. This topic is not only relevant to those living in colder climates but also to anyone who might find themselves needing to paint in less-than-ideal weather conditions.
Addressing the question of how to effectively spray paint in cold weather involves understanding the science behind paint application, paint flow, and the influence of temperature on paint properties. The key lies in preparation, choosing the right products, and adapting the painting technique to suit the colder environment. By modifying practices such as adjusting the painting environment, pre-warming the spray paint, and ensuring the right humidity levels, one can overcome the obstacles presented by low temperatures. This article aims to provide valuable insights and practical tips to help ensure that your spray painting projects are successful, even in the chill of winter.
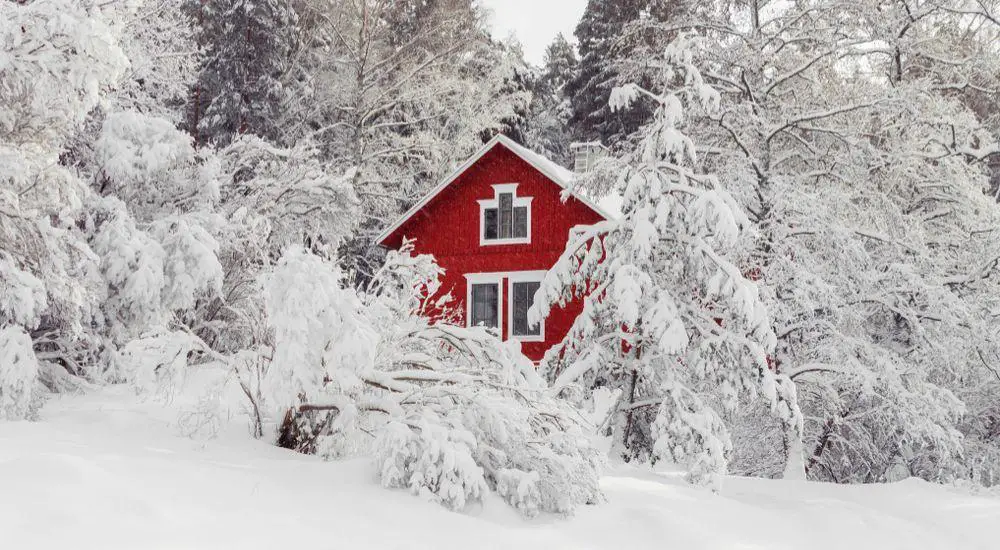
Since the art of spray painting was invented, painters whether professionals or amateurs have been able to turn their painting dreams into reality. A paint sprayer is very efficient and fast. With a quality product, you can spray paint over a large surface in a split second not to mention that you can access complex areas such as corners easily. In my experience, paint sprayers are the best thing to have ever happened to painters. However, just like is the case with any other tools, paint sprayers have some disadvantages of their own. For instance, the weather has to be right for you to come up with quality paint. Discover the best way to spray paint in cold weather.
The moisture and the temperature of your painting environment hugely affect your paint application. However, we all understand that projects have to be completed regardless of the weather. It is for that reason that I provide you with 10 steps on how to overcome the challenges.
Contents
- 1 1. Use the Right Paint
- 2 2. Always Check the Wall Temperature
- 3 3. Turn on the Heat
- 4 4. Always Use a Clean Spray Gun
- 5 5. Paint at the Right Time of the Day
- 6 6. Consider Using a Primer that Bonds Well
- 7 7. Clean the Surface Properly Before Painting
- 8 8. Read the Manufacturer’s Instructions
- 9 9. Mix the Components at the Right Time
- 10 10. Always Protect the Surface to Be Painted
- 11 FAQ’s
- 12 Conclusion
1. Use the Right Paint
The first step is to always ensure the spray paint you are using is suitable for use in cold weather. If you are not sure, you can always read the manufacturer’s instructions or inquire from your local dealer. Let your seller know that you intend to use the spray paint in cold conditions.
2. Always Check the Wall Temperature
Before you start painting, make sure that you test the temperature of your wall or the surface that you are about to paint using a non-contact infrared thermometer. If there is a possibility that the temperature will remain under 35 degrees Fahrenheit for the next couple of days, it is advisable not to spray paint the surface at all. But then again, this will depend on the type of spray paint that you wish to apply using a spray painter.
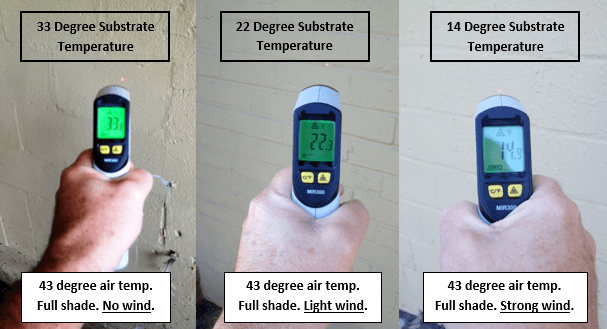
Image credit: mccormickpaints.com
3. Turn on the Heat
Your main hindrance for not spray painting is the low temperature, right? So why not turn up the heat? Depending on your painting site, you can always use a heater to turn up the heat in the room. By doing this, you will be giving your painting surface an opportunity to dry up faster so you can move on to the next project.
Remember, it is only after the surface has dried that you can apply the second and the third coating. However, you should take precautions when heating up the room as you may end up making it uncomfortable for yourself as well. It is important to note that you should wrap everything first before applying a few light coats and turning up the heat to combat cold temperatures.
4. Always Use a Clean Spray Gun
Using a clean spray gun is almost an unwritten law that every painter should know. Apart from boosting the durability of the tool, cleaning your spray gun ensures that no ice or dirt settles in its interior parts so it works well. Clogging and jamming are some of the biggest challenges when using a spray gun, especially in cold weather. It is my guess that you have no option but to use a clean spray gun if you want to finish that painting project.
5. Paint at the Right Time of the Day
I understand that the weather may be too bad for you to complete your project. However, you will not be doing your spray paint any justice if you are spraying paint during times when the weather is extremely cold. I suggest that you start spraying paint at 10 a.m. and be done by 2 p.m. These are times of the day when the temperature is at least warm even in regions where the weather is mostly cold. Additionally, it is between the mentioned period that you will have the utmost natural light to work with since you cannot spray paint in the dark.
6. Consider Using a Primer that Bonds Well
Apart from using a paint that works well in cold temperatures, picking a primer that bonds well under the same low temperature is a wise idea. When painting in cold weather, you cannot afford to settle for a low-quality primer as that will only make your life more complicated. With the experience that I have in the field of painting, how a primer bonds with your painting surface hugely determines whether you will be successful or otherwise.
7. Clean the Surface Properly Before Painting
When spray painting in cold weather, always make sure that the surface is free from dirt or frozen particles. Carefully scrape out the frost and use a clean rag to wipe the particles out. During the cold weather, it might be impossible to see these frozen particles on your surface. However, you can overcome this problem by wiping at least 3 times before you start painting. Many of the poor paintings in cold regions are usually because of dampness.
8. Read the Manufacturer’s Instructions
Most people ignore the manual guides provided by the manufacturers of the products that they use. Never assume that the instructions of your current primer are similar to the one that you previously used. Sometimes it is the little details in the manual guides that determine whether your project will be successful or not.
9. Mix the Components at the Right Time
All the components, be it the primers or the paints, must be mixed in the right ratios and at the right time. Even if you acquire the right paint for cold weather, you might still not come out with perfect results if you do not adhere to the time factor.
10. Always Protect the Surface to Be Painted
Just like yourself, you should always protect your painting surface, especially during the drying process. Because it takes a longer time for the surface to dry when the temperatures are low, it is important to keep it safe from particles and dirt that may fall on it, therefore, destroying your spraying paint project.
FAQ’s
Can I spray paint in cold weather?
Answer: Yes, you can spray paint in cold weather, but you need to take some precautions to ensure that the paint adheres properly and dries evenly. The ideal temperature for spray painting is between 50°F and 90°F, with humidity below 85%. However, you can still be spraying paint in colder temperatures if you take the following steps:
- Store the paint cans in a warm place before you start painting. This will help to thin the paint and make it easier to spray.
- Work in a well-ventilated area. This will help to prevent the fumes from building up and becoming hazardous.
- Apply the paint in thin coats. This will help to prevent the paint from running or dripping.
- Allow the paint to dry completely between coats. This may take longer in cold weather.
- Protect the painted surface from the cold until it is completely dry. You can do this by covering it with a tarp or bringing it indoors.
What type of paint should I use for spray painting in cold weather?
Answer: You should use a paint that is specifically designed for cold weather use. These paints are formulated to adhere properly and dry evenly in colder temperatures.
How can I keep the paint from freezing in the can?
Answer: You can keep the paint from freezing in the spray paint cans by storing them in a warm place. You can also try warming the spray cans up by placing them in a bucket of warm water for a few minutes before you use the spray cans.
How can I prevent the paint from running or dripping in cold weather?
Answer: You can prevent the paint from running or dripping in cold weather spraying by spraying paint in thin coats. You should also make sure that the surface you are painting is clean and dry.
How long will the paint take to dry in cold weather?
Answer: The paint will take longer to dry in cold weather. You may need to wait several hours for the paint to dry completely before spraying paint again. You can speed up the drying process by using a heat gun or hair dryer. However, you should be careful not to heat the paint too much, as this can cause it to bubble or blister.
Conclusion
Spray painting in cold weather is a challenging yet manageable endeavor if approached with the right knowledge and preparation. The key to success lies in understanding the unique demands that lower temperatures place on both the paint and the painting process. By taking these factors into account, you can achieve a finish that is just as smooth and durable as one applied in more favorable conditions.
First and foremost, it’s crucial to recognize the impact of cold weather when spraying paint. In lower temperatures, paint tends to thicken, which can lead to uneven application and a finish that is less than ideal. Additionally, cold air can slow down the drying process, increasing the likelihood of drips and sags in the paint. This is why adjusting your technique and environment is essential. Pre-warming the area where you will be painting, if possible, can help maintain the paint at an optimal consistency. Also, consider using a paint formulated for colder temperatures, which can mitigate some of these issues.
Another vital aspect to consider is the preparation of the surfaces to be painted. Cold weather can cause surfaces to contract and become more brittle, which might affect how well the paint adheres. Ensure that the surface is clean, dry, and, if possible, slightly warmed. This preparation will help the paint to adhere better and dry more uniformly.
Humidity is another factor that plays a significant role in the spray painting process during cold weather. High humidity levels, often found during cold spells, can cause the paint to take longer to dry and potentially lead to a blotchy finish. It’s essential to monitor the humidity levels and choose a time to paint when these are as low as possible. Additionally, using a dehumidifier in enclosed spaces can help control the moisture in the air, leading to better painting conditions.
The application technique itself also needs to be adjusted when spray painting in cold weather. It’s advisable to apply several thin layers of paint rather than a few thick ones. Thin layers will dry faster and more evenly, reducing the risk of running or sagging. Also, be sure to shake the spray can thoroughly before use, as this helps to mix the paint properly, which is especially important in cold conditions.
Finally, patience is key when painting in the cold. Allow ample time for each coat to dry before applying the next. This might mean extending your project over a few days, but the result will be a more professional and durable finish. Remember, rushing the process in unfavorable weather conditions is likely to lead to disappointing results.
In summary, while spray painting in cold weather poses unique challenges, it is by no means an impossible task. With the right preparation, techniques, and understanding of the paint’s properties, you can achieve excellent results. Remember to adjust your environment with a space heater, prepare your surfaces, monitor humidity, apply thin layers, and, most importantly, be patient. With these considerations in mind, your cold weather spray painting project can be as successful as any undertaken in more ideal conditions.

Leave a Reply