If you are looking to do some painting projects, it’s important to know what tools you are using. This guide will tell you everything you need to know about painting edger tools. We’ve done plenty of painting projects in our life, both indoors and outdoors.
We will say that a painting edger has worked well for us when we wanted to make the project as simple as possible. Everyone hates leaving messes behind and certainly doesn’t want to make the project as complicated as it already might be.
Painting is more than just a bucket, a dish, and a brush or roller. If you are painting a metal door, you’d be using sanders or even sanding down by hand.
In this guide, we’ll begin by talking about what a paint edging tool is and the purpose that it serves. We’ll also talk about how to choose one, how it’s used, and other tips on painting a room when time really isn’t on your side.
We know painting can be a slow and tedious process. However, you can get the job done if there isn’t a lot of time to work with. Let’s dive right in now and discuss the tool in more detail.
Contents
What is An Edger Tool?
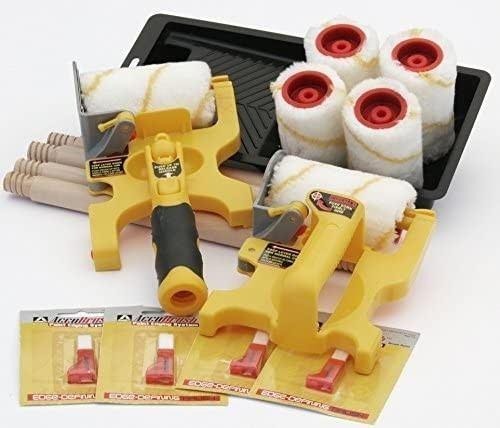
Paint edgers are a tool that will help you paint around the edges without making much of a mess. The tool is inexpensive, small in size, and very easy to use.
If you are planning to paint around the baseboard, moldings (or trims), or any area where the ceiling and walls meet, this is the tool you’ll want to use. It can also work for you if you are planning on painting around window frames.
This tool uses a square-shaped pad and a small set of wheels for easy movement. It also has a handle that ensures excellent control. At first, you may find that the tool is a little hard to use. However, with practice, you’ll be able to get the hang of it. There really isn’t much of a learning curve. You can spend at least a couple of hours on the weekend to learn how an edger tool works.
This tool can certainly be fun to use once you know how to use it. You’ll also find yourself saving a bit more time on your painting projects as well. Not to mention, it may also save you a bit of money that would otherwise be spent on painter’s tape.
How to Use The Paint Edging Tool?
Now that you know about the paint edging tool, we’ll discuss how it works. First and foremost, you’re going to need the following things: a paint edger with a pad already attached (obviously), your choice of paint, and either a small paper plate or paper tray.
Now, we’re going to give you step-by-step instructions on how to use it. If this is your first time using a paint-edging tool, we encourage you to find a spare room that you don’t mind making a mess in.
If you are planning on repainting an interior room, these steps are pretty much the same. That said, let’s get started:
-
Add Paint to the Tray
Pretty self-explanatory. However, we encourage you to add a small amount. You don’t want to be tasked with wiping off excess paint.
-
Lightly Dip the Edger into the Paint
Next, you want to lightly dip the edging tool into the paint. It should be enough to lightly cover the pad. It’s important that the paint is only on the pad and not on the wheels (for obvious reasons).
-
Remove Any Excess Paint, If Needed
Now, you want to run the paint edger in a back and forth motion on the edge of the tray or plate. This will ensure that any excess paint is removed from the moment you dipped it into the tray.
No dip is perfect, so this is the step you want to take. Again, make sure you have just enough paint on the edger, but not a lot to where it can drip.
Don’t be discouraged if you didn’t get enough paint in the initial dip. You can always go back for a little more when you need to.
-
Move the Edger on the Wall
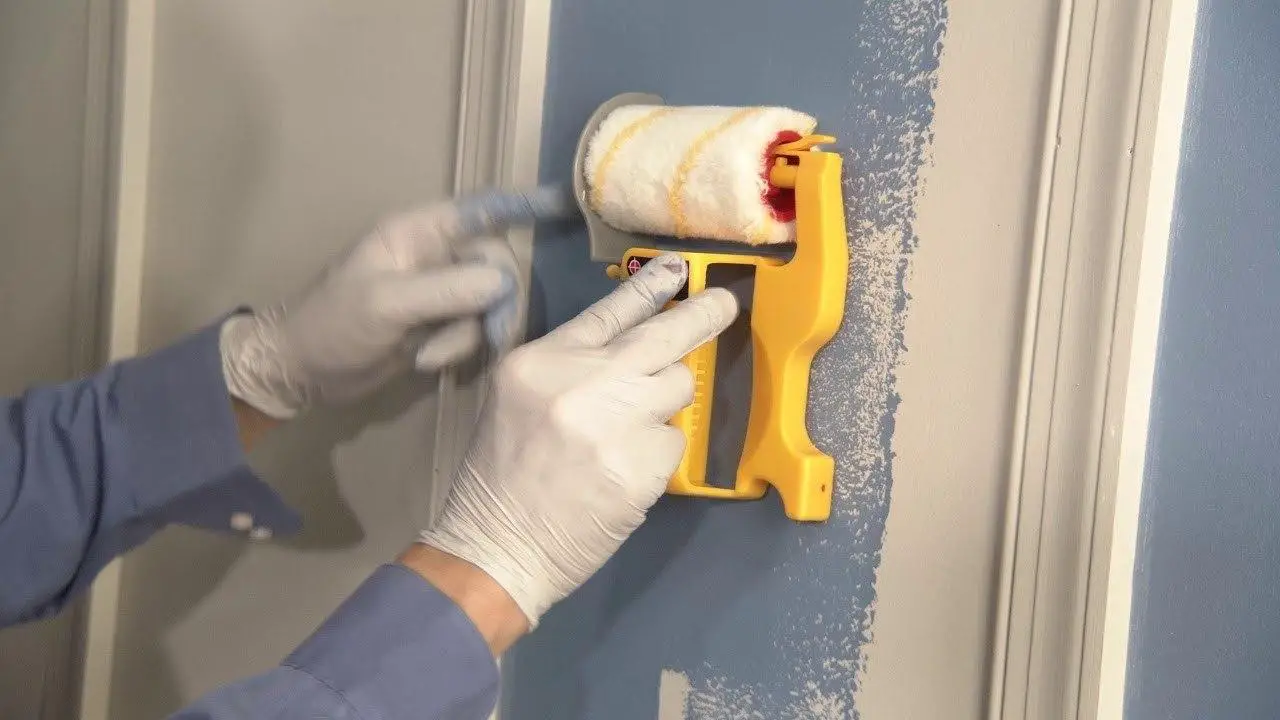
Place the edging tool flat against the wall you intend to paint. Make sure the wheels are in place as well. The wheels could be resting on the baseboard or the ceiling.
It has to be on an adjacent part of the wall. Once everything is properly in place, move the edger slowly. We encourage you to make sure that the paint is distributed evenly so that the paint doesn’t look out of whack.
Apply the paint in the same direction from the starting point to the other end. Don’t be afraid to go back to the tray to add more paint. But make sure you wipe off any excess paint every time you do.
-
Allow the First Coat of Paint to Dry
At this point, you want to allow the first coat of paint to dry. Most projects will call for at least two coats of paint.
So it would be a good idea to apply the second coat when the first one completely dries. Once the first coat is applied, clean off the paint edging tool with warm water. Always do this in-between uses, so things don’t get messy.
Alternatively, you can discard the pad you’ve used and replace it with a new one. Do whatever works best for you.
You should allow anywhere from two to eight hours of drying time. The reason for this is that certain environmental factors can play a role.
However, if you want to get better results, allow the paint to dry for at least 24 hours before applying the second coat. Ideally, you should go with this if you are actually doing a serious paint job and not so much a practice run. But we digress. Once dry, do the second coat of paint using the same process you did with the first. Allow it to dry, and you should be finished.
Also, touch-ups are fine if and when they are needed. If you need to, use a small paint brush to paint any areas or cover up any imperfections you may see. You can also use a damp rag to clean up any smudges if present.
Buying Guide: What to Consider When Choosing A Paint Edger Tool
If you don’t have a paint edger tool, you can purchase one at any hardware store or online. While not every edger tool is created equal, this buyer’s guide will help you find one that will work best for you.
The following factors are the things we would consider when looking for a paint edging tool:
Replacement Pads
Before getting an edger tool, you want to make sure you can easily purchase the replacement pads that go along with it. You want to make sure they are available and not too expensive.
The last thing you want to do is go through many replacement pads and find out a new set as it is a bit more expensive. It would be better to save your money and clean the replacement pads after every use.
There really isn’t a rule on how often you should change them. As long as you can clean off any leftover paint with ease, the pad can still be useful. Otherwise, change it with a fresh replacement pad.
Price
Keep in mind that the paint edger tools can range from $10 to $100. So you’ll want to consider the idea of which one will fit within your budget.
Remember that price and quality will usually run concurrently. However, you should find the best quality you can afford.
Another thing to keep in mind is how often you plan on using the tool. If you are doing just a painting project or two every year, you could get away with something that would be a bit cheaper. Otherwise, you should consider more on quality and performance regardless of how much you pay.
Do You Need An Extending Pole?
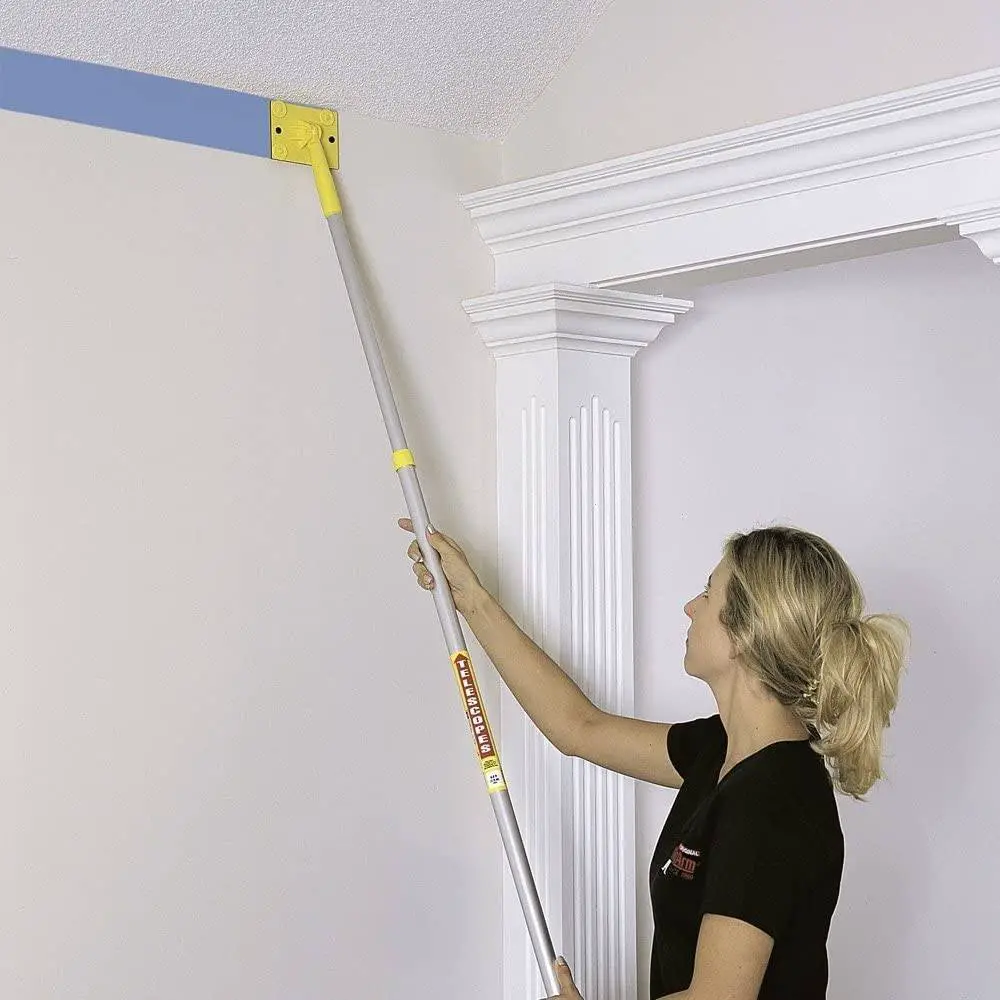
Some edging tools will allow you to add an extending pole. If the walls are much higher (even to the point where you may need a ladder), an extending pole might be a good option.
Find an edging tool that will include this attachment. Otherwise, if the walls you plan on painting are easily accessible by ladder, there really isn’t a dire need to find a tool with this feature.
Size/Shape
Most of the paint edgers you’ll find are usually small in size. However, you may find larger ones if you look hard enough.
However, if you are planning to paint in tight corners or if the walls are small from one end to the other, a small paint edger is what you’ll need. Specifically, triangular edgers will work best if you are planning on working the corners.
Otherwise, the rectangular edgers will do you good for almost every painting job you’ll do.
Movement
You want the movement to be easy and fluid. So it would make sense to find the right edger tool that won’t allow any drag or catch to occur. For this reason, finding one with small enough wheels can make the difference when it comes to moving the pad.
Keep in mind that the quality of your work must always be the focus. You don’t want to have an edging tool that will produce sloppy work. Find one that will make it almost perfect and on point.
Tips for Quick Painting
Paint edging tools will serve you best in the long run if you are doing quick painting jobs. Time may be a factor, and you want to get the job done sooner.
So with that in mind, let’s take a look at the following tips that will help you paint a room much faster if you only have a couple of days to work with:
Prep the Room
This first step is pretty self-explanatory. Make sure you get all the furniture and other items out of the room and store them somewhere else temporarily.
Also, remove any fixtures if possible. This includes outlet covers, light fixtures, or anything that can be removed and set off to the side.
Begin at the Top
Specifically, start painting the ceiling first. It may be a challenge to paint the ceiling, but you’ll be getting the most difficult part out of the way first.
Not to mention, if there are any paint splatters on the wall, it will eventually be taken care of. As soon as you get to the walls, those splatters will be covered.
Make Sure the Area is Well-Ventilated
As always, you’ll want to make sure the area you are painting in is well-ventilated. Between coats, you want to open up any windows. If the weather is inclement, don’t open the windows and use fans instead.
If you want the drying time to be quick, consider applying thin coats. Alternatively, you want the humidity to be low since moist conditions can make drying time a lot longer.
Once the second paint coat is completed, just repeat the process until the paint is completely dry.
Conclusion
We hope you find this guide about paint edging tools helpful. We know using these can be a bit of a challenge at first.
If you have a painting project, you may find these worth using, especially if it’s a project that needs to be done fast and without sloppiness. We also hope that you can find a good edging tool using the buyer’s guide we put together. This will be something that will make the selection process easy, no matter what your budget is or what your project calls for.
Find a painting edger tool and use it to your advantage, and you’ll have every painting project turn out great every time.


Leave a Reply