Are you eager to learn how to professionally use a Porter-cable air compressor? Most people tend to think that it is quite difficult and frustrating. However, the entire experience is easy and straightforward once you know all the steps.
Many DIY enthusiasts and professionals prefer the Porter-cable compressor because it is efficient and comes at a pocket-friendly price. You will also get to save a lot of time when putting air into balloons, swimming pools, and flat tires.
Before you turn on the machine and start using it, you must learn how to effectively use it for different applications. A majority of people hardly go through the user manual since it seems like a lot of work. Luckily, I have put together a comprehensive guide on how to use a porter cable air compressor like a pro.
Contents
Why Should You Purchase A Porter-cable Compressor?
- It is highly portable
- Comes at a reasonable price
- Easy to use with other tools
- Can be used for a variety of projects
- Long-lasting construction
Understanding The Basic Components
Before you can use your Porter-cable air compressor like a professional, you need to know at least some of the basic components. Getting to know a few basic pieces will help you get the most from your machine.
Manifold Kit
Essentially, your manifold kit consists of 2 quick connects, 2 gauges, a regulator, a manifold, and a nipple close. Note that the tank gauges will help you determine the amount of pressure inside your tank. The outlet gauges, on the other hand, will showcase the air pressure coming out of your device. Finally, the regulators are used to adjust the air pressure that comes out.
Valve Check
A check valve is a handy tool that prevents air from making its way back into the cylinder. Note that air needs to move from the cylinder to the tank and not the other way round. Note that a broken valve will cause your motor to start producing humming noises. However, it will not rotate until the problem is fixed.
Safety Valve
The safety valve will help ensure that the tank doesn’t get over-pressurized when performing different tasks. It is an indispensable part that ensures you get long-lasting services from your machine.
Drain Valve
Understand that water will condense in your tank after a period of continued use. The drain valve is an excellent addition that will allow you to open up the container to get rid of all the moisture. Note that water can lead to serious damages when not properly handled.
Basic Operations of the Porter-cable Air Compressor
Step 1: Locate the Air Compressor
Locate your new air compressor and set it down in a clean and dry area. It would also help if you picked a well-ventilated area to help prevent airflow blockages which can damage the machine. Note that working in a well-ventilated area ensures both your safety and the safety of the machine.
Step 2: Run the Break-in Process
Allow your machine to heat up to ensure you get long-lasting services. Ensure that the drain valve is fully open before plugging in the compressor. Note that the compressor has to run for around 15 minutes before you can switch it off. Your Porter-cable air compressor is ready to use once you carry out the break-in process.
Step 3: Assemble all the Needed Accessories
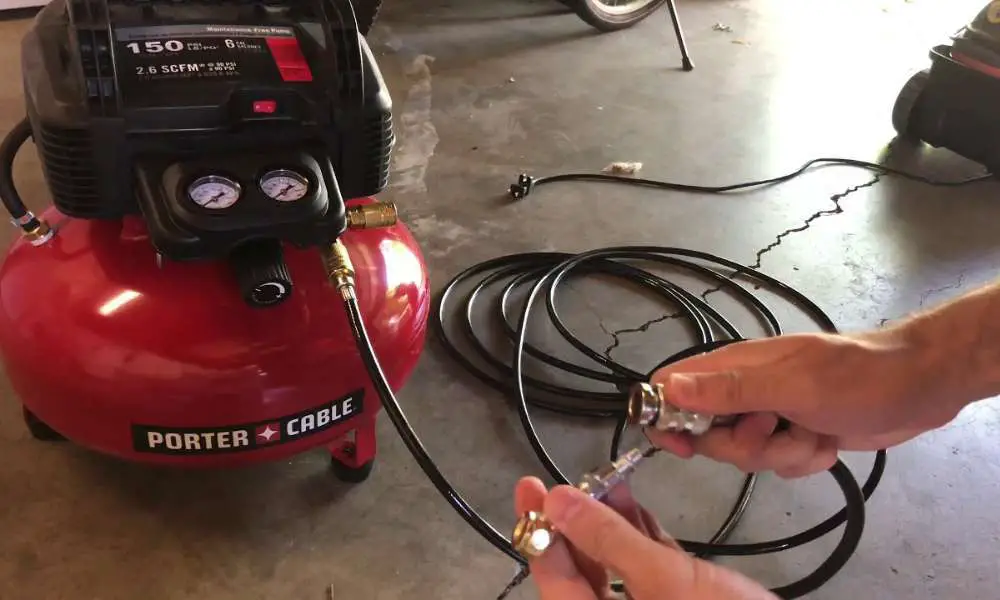
It would help if you plugged in everything before using your compressor. Understand that the air hose and compressor both feature quick connections. All you need to do is push them back to make a solid connection. The beauty of working with air compressors is that everything always seems to fit in perfectly.
Step 4: Start Your Machine
Before you start the machine, ensure you close your drain valve. When you switch on the machine, you will immediately notice a loud noise. Do not worry about the noise because it doesn’t mean that there is any problem with your machine.
The machine will automatically stop when it reaches the maximum pressure level. You can then use the attached regulator to adjust the air pressure to suit the kind of tool that you are using.
Step 5: Drain the Water
Moisture will build up in your tank after daily use. You have to regularly drain your tank to avoid serious damages. Experts advise that you drain the moisture from your tank after every project. before draining the water, you must have ear protection.
Turn off your machine and reduce the regulator to zero. You can then pull the ring to release the safety valve which will drain our air until the pressure gets down to 20 PSI. when you open the drain valve, you will notice that water will come out automatically.
Cautions
Always Monitor the Safety Valve
Understand that a damaged safety valve will cause your tank to either explode or crack. You need to ensure that the safety valve is working effectively before embarking on a project. Always pull on the ring to ensure that it is working effectively. If you notice that the safety valve is stuck, then it is time to purchase a new one.
Be on the Look-out for Flying Objects
When using air compressors, you have to be very careful since small instruments can easily get tossed into the air. Always wear your safety equipment to avoid getting injuries from flying tools such as chips and nails.
Electrical and Fire Risk
Do not use your machine outside the house or workshop when it is raining. You should also never use the compressor near any explosive substance including flammable materials and gasoline. show more safety tips .
Conclusion
Ensure you follow our detailed guide when using your Porter-cable air compressor. Follow all the stipulated guidelines to ensure that nothing goes wrong while working on a project. It would also help if you read the user manual to give you a better understanding of your machine.
Hopefully, you have learned everything you need to know about how to use a porter-cable air compressor like a pro. You can go ahead and start using the machine for whatever task you have planned at home or in your workshop.


Leave a Reply