Painting your home’s exterior is not as simple as it seems. There is a lot of pressure involved considering that the kind of work you do will impact your home’s value. We all understand that a quality paint job with a paint sprayer will help protect our homes from weather damage while prolonging their life.
Most people aren’t entirely sure of how to spray paint a house exterior. Although spray painting will save you a lot of time and effort, you need a little bit of expertise to pull off a professional finish. In this article, we will take you through step-by-step instructions on how to paint your home’s exterior with a paint sprayer. We will also include pro tips on how to use a paint sprayer to help you get that smooth finish that you need.

Contents
- 1 9 Steps to Spray Paint a House Exterior
- 1.1 Required Tools
- 1.2 Step 1: Pressure wash the external walls
- 1.3 Step 2: Repair All The Damaged Surfaces
- 1.4 Step 3: Remove Loose Paint
- 1.5 Step 4: Caulk Trim
- 1.6 Step 5: Prime Stains
- 1.7 Step 6: Protect Windows, Doors, and Lights
- 1.8 Step 7: Paint the Exterior
- 1.9 Step 8: Paint Doors and Trim
- 1.10 Step 9: Clean up
- 1.11 Conclusion
9 Steps to Spray Paint a House Exterior
Required Tools
Paint
Scraper
Caulk gun
Plastic sheeting
Spackle knife
Epoxy filler
Stain blocking primer
Painter’s tape
Ladder
Drop cloths
Pressure washer
Exterior semi-gloss paint
Exterior eggshell or flat paint
Paintbrush
Medium grit sanding block
Step 1: Pressure wash the external walls
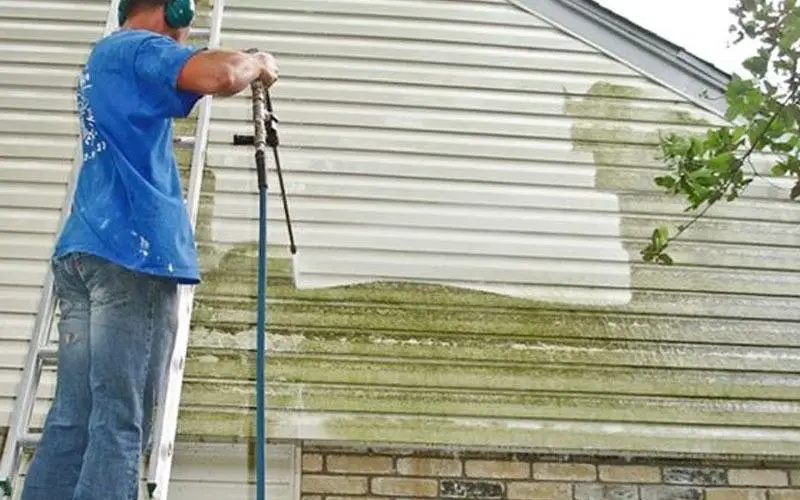
To get a professional finish, you need to ensure that your wall is completely clean. Use a pressure washer to get rid of all the dust and dirt that have accumulated on your wall. For better results, ensure that you work from top to bottom in a controlled manner.

Overlap your strokes by about 8 inches to get better results. Using a pressure washer to clean your walls will ensure that you complete this step faster. You will also get to the hard-to-reach areas much quicker than using water and a brush.
You must also remove all outdoor furniture that is next to your wall. You don’t want to get paint all over your grill because there is bound to be overspray from an airless paint sprayer. Ensure that you create plenty of room to allow you to move freely with your spray painting equipment and tools.
Step 2: Repair All The Damaged Surfaces
Once your house’s entire exterior is clean, you need to identify all the damaged areas. Walk around your entire house taking notes of all the damaged areas, including masonry, wood siding, metal, stucco, and siding. Use the spackle knife to apply epoxy filler to the holes and cracks.
Applying epoxy filler is a pretty straightforward procedure that requires a little bit of patience. Use your spackle knife to ensure that you get a uniform surface that is ready for spray painting. Ensure that you repair any damaged trim, soffits, and siding as well.
Step 3: Remove Loose Paint
You then have to deal with any chipped or loose paint around your house. Use your medium grit sanding block or paint scraper to remove all the loose and chipped paint. Start by placing drop cloths along the ground to ensure that you have an easy time during clean up.
Yes, you can paint over old paint but only if it is still in good shape and super clean. However, most of the time, the new paint won’t adhere fairly well since the old paint is probably blistered in a few areas. Let us take a quick look at how to remove loose and chipped paint effectively.
The paint scraper is shaped like a razor with a broad head and a thin handle. The paint scraper is designed to be pulled and not pushed forward. This step will require a lot of muscle work, especially when your old paint is hugely damaged. Ensure that you move slowly and steadily while taking necessary breaks.
Place the end of your paint scrapper under the raised edge of the old paint. Press your scrapper forward until you get a good grip on the old paint. Exercise patience to ensure that you don’t damage the wood, especially when you are using a sharp scraper.
You could also use a heat gun to get rid of all the loose paint. The electric heat guns are simple to use, although they can be quite slow. Your heat gun gets hot but does not produce any flame making it ideal for the removal of paint on wood. Place your heat gun several inches away from your surface to peel away the loose paint.
Step 4: Caulk Trim
You will notice a few gaps between your trim and the house around the windows and doors. It would help if you filled all these gaps using a caulk gun and exterior caulk. If your home has mixed materials like brick and siding, you will need to add caulk along the surfaces where the materials meet.
Adding caulk to these gaps will ensure that you keep your house waterproof. They are also a good option when you need to mask the joints between different materials used in the construction of your home. Understand that the caulk is your first line of defense against any leakages. You must, therefore, carry out a perfect job during this stage.
Apply the caulk in the gaps in one direction and use a perpendicular motion to smooth it out. Doing this ensures that you get a smooth surface that is at the same level as the original surface. Allow the compound to harden and shrink before applying a second coat. Sand out the surface to ensure that you get a smooth and even result.
Applying caul ensures that you get a professional finish in the end. Understand that your home needs to look exquisite once you are done with the exterior painting project. Acrylic caulk is preferred by most professionals and is worth considering.
Step 5: Prime Stains
Examine the exterior of your home for any visible wood knots or stains. You will need to apply a coat of primer to these areas using a paintbrush. Ensure that you get a stain-blocking primer to get the best results during this step.
Stain-blocking primers are useful when you need to cover stains on the exterior of your house. Understand that your house’s exterior will have several stains such as nicotine, markers, watermarks, and smoke.
Step 6: Protect Windows, Doors, and Lights
Protect the doors, light fixtures, and windows from paint overspray by covering them with plastic sheeting. Using the painter’s tape, ensure that you cover the entire area with the plastic sheeting. This step requires a lot of patience since you will be forced to move up and down your ladder.
Some lighting fixtures are way up, and you will need to use your ladder. Most of the time, you will need some assistance from your friend or family member. Exercise a lot of caution during this step to avoid any accidents.
Close the windows and door to ensure that no paint gets into your house. Paint sprayers usually have a lot of oversprays, especially when you are working outdoors. Get a pair of overalls and protective clothing to shield you from the small paint particles.
Step 7: Paint the Exterior
Once you are done with steps 1 to 6, you can start spray painting your house exterior. The first step is diluting the paint effectively so that you get a smooth finish with your airless paint sprayer. The substance that you will use for the dilution process will depend on the type of paint that you are using. Oil-based paint will need a petroleum-based solvent, while water-based paint uses water.
Pour the paint into a big container and add the thinner as instructed by the manufacturer’s manual. You will need about ½ a cup of solvent for a gallon of paint. Stir the mixture using a stirrer until you attain the desired consistency. Lift your stirrer periodically and examine how the paint slips away and back into the container. There should be no lumps, and the paint color should be consistent. Once the paint is thinned correctly, you can use it with your spray gun. Note that you may need more coats because you have diluted your paint.
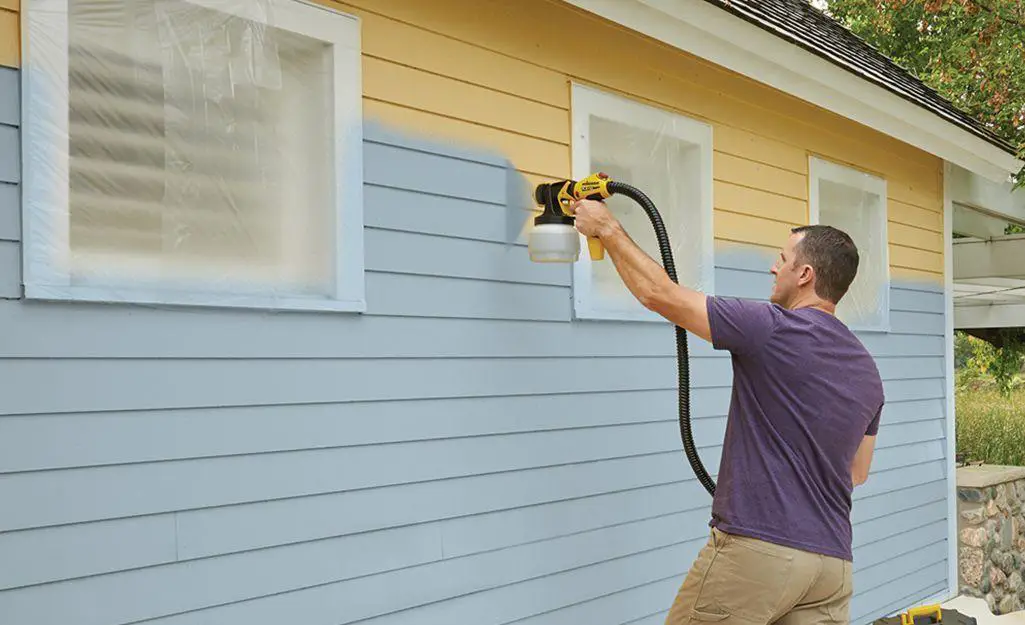
The best way to spray paint your house exterior is by working your way from top to bottom. You have to complete a section before you move on to the next. This procedure will apply to the soffits, stucco, and siding.
Choose a side and start at the end while spraying at a consistent speed. Move across while overlapping the paint strips by about 8 inches to ensure you get a smooth finish. Repeat the procedure while slowly descending your ladder. Move to the second section and repeat the above process until you finish painting the entire side.
A horizontal direction spray pattern will ensure that you get a smooth and even finish. The back-and-forth motion gets you overlapping strokes, which is excellent when you need a perfect finish. You need to keep your spray gun and tip at a perpendicular angle while spray painting the entire exterior. Do not swing your spray gun at the end of each painting stroke for a better finish.
Keep your spray tip at a distance of between 10-14 inches from the surface while painting. If you hold your gun tip too close to the surface, your finish will have sags and runs. Too far away, however, will lead to a rough finish similar to what happens when you use sandpaper.
Understand that more paint is discharged to the center rather than the edges with each stroke. You must, therefore, overlap each paint stroke by about 8 inches. Ensure that you use the same tactic for all sides.
Step 8: Paint Doors and Trim
Proceed to remove the plastic sheeting from windows, doors, and light fixtures. Use your paintbrush to add two coats of Semi-gloss paint to your doors and woodwork. This process will require a little bit of finesse, and you need to be careful. Use consistent brush strokes while moving from up to down. Long strokes are preferable because you get better consistency. Once you are done painting your trim and doors, you can remove the drop cloths.
Step 9: Clean up
You need to clean your paint sprayer after you finish the paint spraying job. Follow the directions included in the user’s manual when cleaning your airless sprayer. Cleaning your paint sprayer ensures that you get a perfect finish when you paint your house.
You can then proceed to replace all the different materials that you have moved while painting your house exterior. Fix any light fittings that you might have removed and let the paint dry completely.
Conclusion
Spray painting your house exterior is a straightforward task using this step-by-step instruction. I understand that your home’s exterior will directly impact its market value. A professional exterior finish gives your home the perfect first impression.
We hope that you found this article both entertaining and informative. Feel free to leave your comments and views in the section below. We would love to know what you think about spray painting the exterior of a house. Don’t forget to share the article with friends and family looking to improve their homes.


Leave a Reply