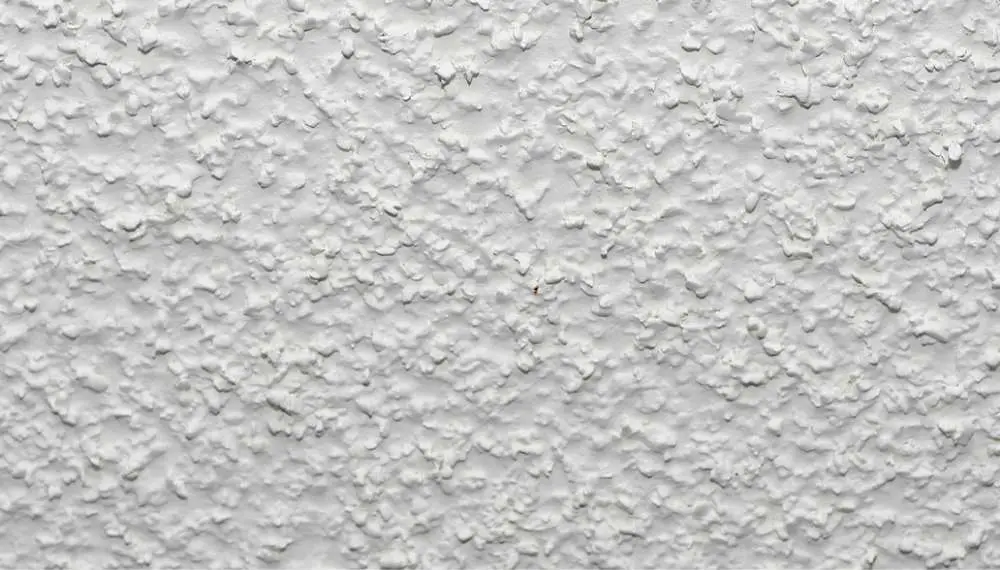
What is a popcorn ceiling? How do I do away with the dirt on my popcorn ceiling? Should I just get rid of the whole ceiling? Well, there are different types of ceilings and popcorn ceilings is one of them. In the early years, popcorn ceilings were very popular and they still are. Learn the pro tips when it comes to painting a popcorn ceiling.
Most homeowners prefer this ceiling because it absorbs sound and reduces echo significantly. This can be great especially with rooms full of kids or people who play loud music. While popcorn ceilings are popular, they wear out, catch stains and become dirty as time goes by.

As opposed to removing your popcorn ceiling, which is tedious, time consuming and expensive, painting is a perfect option. Since I know most things about paints and how they work, I will take you through the process of how to paint popcorn ceiling without making a mess. You will learn a few things from this piece.
Contents
What is a popcorn ceiling?
Before we start, let us get it out of the way that popcorn ceilings refer to a ceiling made of spray-on paints and have bumpy surfaces created from vermiculite or polystyrene. As aforementioned, popcorn ceilings are perfect for sound deadening.
What You Will Need
Just like any other DIY project, you will need to gather everything that you will need before painting a popcorn ceiling. The most common tools and materials include:
Protective gear
Ladder
Canvas drop cloths
Painter’s tape
Plastic sheeting
Angled brush
A bucket
Paint brush
A thick roller
Airless sprayer (as an alternative to a roller and paint brush)
How to paint popcorn ceiling
Step 1: Preparation
In my experience, the preparation stage is as important as any other. In rare cases, your ceiling might be clean, meaning you can start painting straight away. However, for you to think of painting your popcorn ceiling in the first place, it must be dirty or stained. During the preparation stage, clean the stains and spots from the ceiling. Prime it if necessary. A ladder should help you reach the entire popcorn ceiling surface.
Also remove all the furniture and anything else that is not helpful from the room. Spread your canvas throughout the room to prevent paint from damaging your floor. If you have nowhere to take your furniture, you can use the plastic sheets to cover them. Use a painter’s tape to cover the areas that the plastic sheets won’t cover. You can also put the plastic sheets on the areas of the wall that are likely to be affected when painting your ceiling.
Step 2: Mix the Paint
The type of paint you use relies solely with you. Water-based paints and an odorless primer are my favorite when it comes to painting over popcorn ceiling. As for the color, I prefer the neutral ones as they give me a perfect blend with the rest of the room. If your paint is very thin, you will need a paint thinner. Mix your paint in accordance with the manufacturer’s instructions.
Step 3: Start By Painting the Edges and Around the Lights
When you have the right paint, with the aid of a ladder, use your paint brush to start painting from the edges and around the lights. If you are a beginner, you may need to practice on a board before you start painting your ceiling because then, there will be no room for mistakes.
For the edges and around the lights, I prefer using a paint brush because the roller cannot access all the areas with that respect. To avoid damaging the walls, I usually start my painting 2 inches away from the wall.
Step 4: Paint the Popcorn Ceiling
Once done with the areas around the lights and the edges, start painting your ceiling in a north/ south direction. Here, you can use either a painting brush or a roller depending on your preferences. I prefer using a roller because I find it quick and efficient considering that the whole process of painting the ceiling is not comfortable.
I like to overlap each stroke by over 50%. This way, I am sure that the whole ceiling will be painted evenly in the end. Also, if you choose to use a roller, do not press it so much on the wall. Doing so will flatten the roller and with time, it may not be able to hold as much paint as before.
Repeat the process, but this time, paint from east to west. It is normal for some texture to come off from the ceiling as you paint so do not worry when this happens. However, if the textures start coming off in large chunks, you know you have a real problem. You can solve this problem by using an airless sprayer.
Step 5: Allow the Ceiling to Dry
If you are satisfied that you have covered all the areas of the popcorn ceiling, let it dry then observe again. If you notice any unevenness, finesse the affected areas. Rearrange your house and enjoy the new paint!
Pro Tips
Consider the following pro tips when painting popcorn ceiling:
Always overlap each stroke by 50%. If your first coat spray/ paint is north/south, the next one should be east/west. If you are using a spray gun, start moving it across your ceiling before pulling the trigger. Keep moving your hand when painting or spraying. This will prevent unevenness.
Conclusion
When you hear about it for the first time, painting your popcorn ceiling sounds a bit tricky. However, having been in the field for over a decade, I can confidently tell you that it is easier and cheaper to paint your ceiling than to replace the whole thing.
After gathering everything that you will need for the project, start by preparing your ceiling, walls and the room at large. Remove the cobwebs, stains and dust that may have settled on the ceiling over time.
Mix your paint according to your manufacturer’s instruction and paint the first coat in a north/south direction. Apply the second coat in an east/west direction and allow it to dry. Never pause while painting over popcorn ceiling as that will cause unevenness. Hopefully, this piece has been informational to you. If so, please leave a comment below.


Leave a Reply