There is no doubt that a paint sprayer is one of the most useful tools in any workshop. A paint sprayer, an airless one to be specific, is very efficient, convenient, and delivers perfect results. However, to continue operating at the top level, it is important to clean your tools as soon as you are done with your painting project.
As the paint passes through the system of your airless paint sprayer, chances are residues will remain and if not cleared, they might cause clogging. Fortunately, this article takes you through the process of how to clean an airless paint sprayer for the greater good.

Contents
- 1 What You Will Require
- 2 Method 2
- 3 Benefits of Cleaning and Caring for an Airless Paint Sprayer
- 4 FAQ’s
- 4.1 Why is it important to clean an airless paint sprayer after each use?
- 4.2 What materials do I need to clean an airless paint sprayer?
- 4.3 What are the basic steps to clean an airless paint sprayer?
- 4.4 How often should I clean the filters on my airless paint sprayer?
- 4.5 Can I use a garden hose to clean my airless paint sprayer if I used water-based paint?
- 5 Conclusion – How to Clean an Airless Paint Sprayer
What You Will Require
As aforementioned, cleaning an airless sprayer is not at all a complicated task. In that case, you will only require basic tools and materials for cleaning such as:
– Soap- Your preferred cleaning agent- Plenty of water- Thinner- Scrubber – Cleaning buckets/ flashing pail
1. Preparation
Just like any other project, cleaning your paint spray gun requires that you prepare well for the task ahead. Luckily for this project, there is nothing complicated at this stage. Start by switching off the paint sprayer. This is usually a precautionary measure given that electricity and water do not do well together. The next step involves reducing the airless paint sprayer’s pressure to the lowest point. Depending on the type of airless sprayer that you using, you can achieve the same by triggering the spray gun.
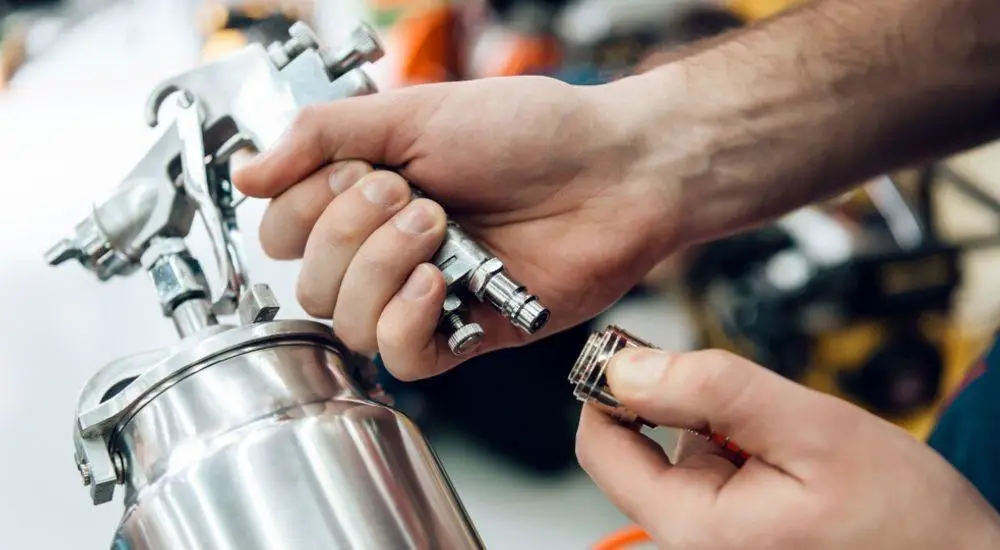
Also during the preparation stage, you should disassemble all the parts of your paint sprayer, remove the filter then assemble them back together. Removing the filter from the spray gun means your cleaning agents will reach all the required areas of your paint spray gun. Finally, remove the guard and the spray tip in preparation for the next step.
2. Clean Your Paint Sprayer
After the preparation stage, this is where the actual cleaning begins. Start by cleaning the disassembled guard and spray tip. It is advisable to use flushing fluid such as water or a paint thinner depending on the type of paint used in the last project. For instance, if you used water-based paints, you should wash the guard and switch tips using water. On the other hand, if you used oil-based paints in your project, consider using mineral spirits and other thinners when cleaning the parts.
If your paint sprayer has a removable spray gun filter, proceed to clean it before embarking on the other interior parts of your tool. After washing all the removable parts, it is time to focus on the interior system. Turn on the airless paint spray gun and push the prime valve horizontally (for safety purposes).
Using your flashing pail, hold your paint gun against it and push the “safety off” button. This will allow the flushing fluid to run through the system thereby cleaning it in the process. Run the cleaning fluid in the system until it becomes clear then let go of the trigger. You can mix the flushing fluid with soap or thinner depending on the type of paint you used.
The final step of cleaning involves turning the prime valve down so that the flushing fluid runs to all the other parts of the airless sprayer. Let the fluid circulate for approximately 3 minutes before turning it down.
3. Finishing
Just as is the case with any other tool, it is important to rinse your airless sprayer with plenty of water until clear. You should then allow the disassembled parts to dry up before fixing them back in place. Some models require that you flush them with mineral spirits or any other thinners after rinsing them with water. This will create an extra layer of coating that will, in turn, prevent the system from corrosion, freezing, or rusting.
Finish by assembling the detached parts. Start with the filter bowl and tighten it back in place using your hand. Proceed to the spray gun handle and to any other part that might have been detached from your paint sprayer.
After fixing all the parts, you can test that your paint sprayer is working by running water through the system. Turn the power on and apply pressure on the trigger then observe what happens. Once satisfied that your paint sprayer is in good condition, gently wipe its exterior parts using a clean damp cloth soaked in water and washing detergents. You should then return the airless sprayer to its position in your workshop for storage in readiness for the next project.
Method 2
Alternatively, if you do not have much cleaning time, you can refer to this quick method of cleaning an airless paint sprayer. All you will require is thinner (for oil-based paints), a bucket, water (for latex-based paints), a paintbrush, and a clean cleaning cloth. For safety measures,
you will also need a pair of gloves and relevant protective clothes then follow the steps below:
1. Remove the excess paint from the paint gun
To save time, start by triggering the airless spray gun to remove the excess paint residues. In some cases, you can use a thinner to remove the excess residues. Remove as much paint as possible and clear the thinner in the can as well.
2. Clean with plenty of water
After removing the excess residues, take a paint bucket filled with water and use it to clean the interior parts of your airless paint sprayer. Run the water through the system until clear. Depending on the type of paint used in the most recent painting project, you can mix the water with a thinner for faster and more effective results.
3. Scrub the outer parts
Take a scrub or a clean cloth dipped in water and use it to clean the parts that are visible and easily accessible. After cleaning, leave the paint sprayer to dry for some time before returning it to its original position in readiness for the next painting project.
As you may have noticed, this method is quicker and somewhat effective. It is suitable for cleaning your airless paint sprayer especially when you are in a hurry. However, this method is not as effective so it cannot be relied upon as much.
Pro Tips
The following pro tips will help you complete your airless paint sprayer quickly and effectively:
– Always gather every tool and material that you will need for the cleaning process beforehand.
– Always clean your airless sprayer as soon as you finish your painting project.
– Always read the manufacturer’s manual guide for extra customized cleaning procedures.
– Always turn the power off before you start cleaning to avoid the risk of electrocution. Only turn it on when it’s very necessary and adhere to the basic precautionary measures.
Benefits of Cleaning and Caring for an Airless Paint Sprayer
For many people, cleaning their tools is something they know they have to do but do not really know why they do it. Here are some reasons why cleaning and caring for your airless paint sprayer is very important:
1. Enhances durability
Regularly cleaned airless paint sprayers will last longer than one that is neglected with paint residues and dirt. Cleaning paint sprayers give them their original shape, look, and workability. For as long as your paint sprayer is “new”, it will continue to serve you for as long as possible. This ensures that you get value for your money.
2. Boosts efficiency
A clean airless paint sprayer works just like a new one. There are no residues or clogged filters to limit its functioning. However, you will struggle to use a dirty paint sprayer not to mention the fact that your projects will always be compromised. Your painting surface will not be even due to clogs, unclean filters, malfunctioning triggers, and paint guns.
3. Maintains the look of your paint sprayer
If you bought your airless paint sprayer specifically for how it looks, you can maintain that by cleaning it regularly. A dirty spray gun will lose its color, texture, and workability within a very short time.
4. Makes your workshop neat
Apart from increasing the durability and effectiveness of your airless paint sprayer, regular cleaning makes your tools and workshop clean. It relaxes your mind knowing that you have a clean tool to use during your next project. You are almost sure that there is no chance your paint sprayer is going to fail you.
FAQ’s
Why is it important to clean an airless paint sprayer after each use?
Answer: Cleaning an airless paint sprayer after each use is crucial for maintaining its performance and prolonging its lifespan. Proper cleaning prevents the paint from drying and clogging the sprayer components, ensuring smooth operation and reducing the risk of malfunctions. Regular cleaning also helps maintain the quality of the spray pattern, resulting in a more professional finish for your projects.
What materials do I need to clean an airless paint sprayer?
Answer: To clean an airless paint sprayer, you’ll need:
-
- The appropriate cleaning solvent (water for water-based paints or paint thinner for oil-based paints)
- A cleaning brush or toothbrush
- A bucket or container for waste solvent
- A clean cloth or rag
- Protective gloves and eyewear
What are the basic steps to clean an airless paint sprayer?
Answer: To clean an airless paint sprayer, follow these steps: a. Turn off and unplug the sprayer. b. Release any remaining pressure by triggering the spray gun into a waste container. c. Remove the spray tip and guard, and clean them thoroughly with the appropriate solvent. d. Flush the sprayer system with the cleaning solvent by running it through the intake and return tubes until the liquid runs clear. e. Clean the filter and any other removable components with the solvent and a brush. f. Wipe down the exterior of the sprayer with a clean cloth and solvent. g. Reassemble the sprayer and store it in a dry, cool location.
How often should I clean the filters on my airless paint sprayer?
Answer: Ideally, you should clean the filters on your airless spray gun after each use to ensure optimal performance. Regular cleaning prevents clogs and helps maintain a consistent spray pattern. However, if you’re working on a large project with the same paint type, you may be able to clean the filters less frequently, such as after every few gallons of paint out of your paint bucket.
Can I use a garden hose to clean my airless paint sprayer if I used water-based paint?
Answer: Yes, you can use a garden hose to clean your airless paint sprayer if you used water-based paint. However, it’s essential to ensure that you thoroughly flush the entire system and clean all components, including the spray tip, filters, and hoses. After using the garden hose, it’s a good idea to run clean water through the sprayer to remove any remaining residue or contaminants. Always follow the manufacturer’s instructions for cleaning and maintenance to keep your airless paint sprayer in the best possible condition.
Conclusion – How to Clean an Airless Paint Sprayer
A paint sprayer can determine whether you are going to finish your project in time, how nice your furniture will look, and will make or break your reputation as a painter. In that case, before kick-starting a painting project, you should make sure that your airless paint sprayer is in top condition. One way of ensuring this is by cleaning and taking care of your tool.
Fortunately, this article has elaborated on how to clean for an airless paint sprayer so you do not have to worry. Remember, cleaning your tools regularly will help maintain their top conditions, increased durability, and will look good overall.


Leave a Reply