Hammers have been around for over three million years. They started as simple stones and eventually became specialized tools for all sorts of jobs.
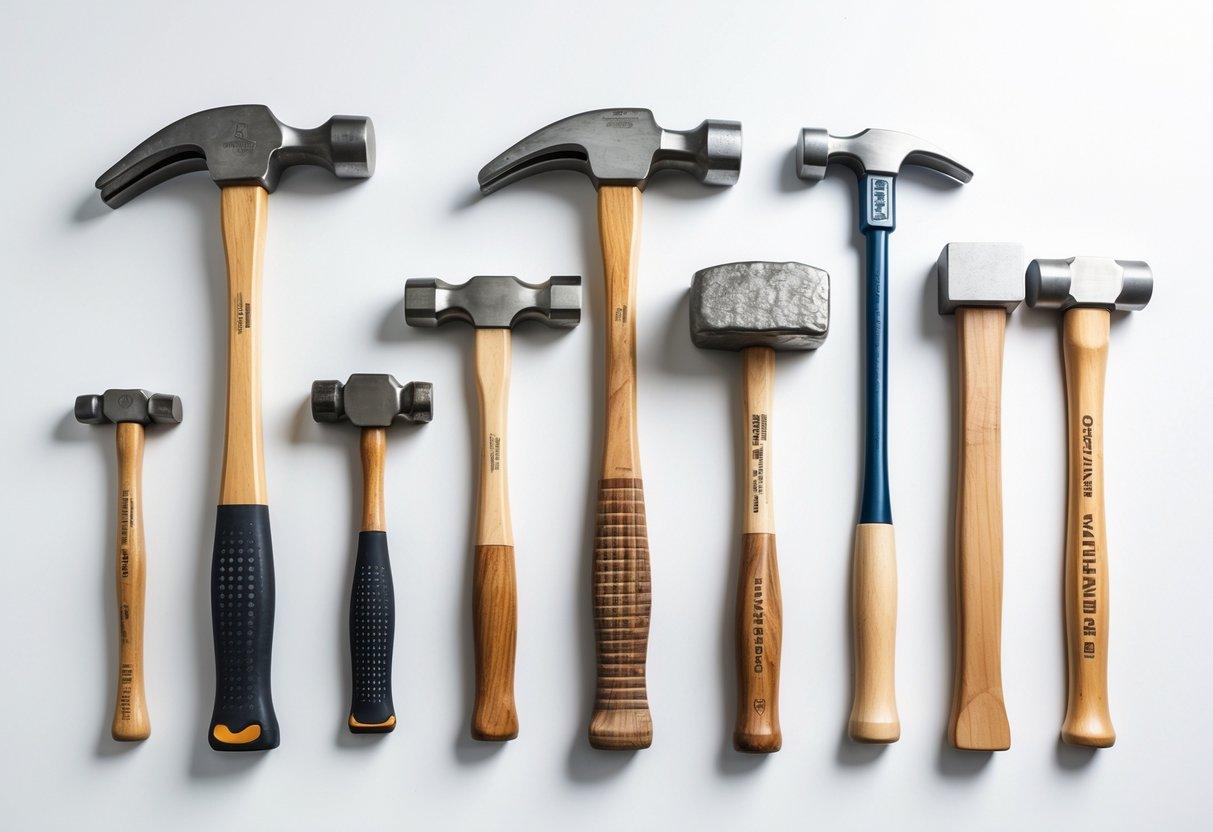
Most folks picture the classic claw hammer, but honestly, there are dozens of types out there. Each one is tweaked for a specific purpose—construction, metalworking, crafting, you name it.

Choosing the right hammer for your project can mean the difference between professional results and damaged materials, injured fingers, or frustrating setbacks. I’ve watched DIY projects go sideways just because someone picked the wrong hammer from the pile.
A delicate trim job? Totally different from demolition. If you use a sledgehammer when you need a tack hammer, well, you’re asking for trouble.
Let’s dig into the anatomy of hammers, check out the most common types, and look at some specialty tools for the odd jobs. I’ll touch on modern handle tech, picking the right size, and when soft-faced mallets are better than steel heads.
Contents
Understanding Hammer Anatomy

Every hammer is made up of a few key parts that work together. The handle material impacts how it feels, how heavy it is, and how long it lasts.
Modern hammers often come with shock-absorbing features. These can really save your hands and wrists if you’re swinging all day.
Essential Parts of a Hammer
Let’s break down the basics. The head is where the weight and power come from.
The face is the business end—the spot that hits nails or whatever you’re pounding. Most faces are a little curved to keep the hammer from glancing off.
Some hammers have waffle or textured faces for extra grip on nail heads. The handle attaches through the eye—that’s the hole where wooden or fiberglass handles slot in.
Steel hammers often skip the separate eye and go for a one-piece build. Here’s a quick rundown:
- Face: Where you strike
- Head: The weighty part
- Throat: Connects the head to the face
- Cheek: Side of the head
- Eye: Where the handle joins
- Handle: For grip and leverage
- Grip: Where your hand goes
The claw or peen sits on the opposite side of the face. Curved claws yank out nails, straight claws are better for prying, and ball peens are handy for shaping metal.
Material Choices for Hammer Construction
Handle material really matters. Each type brings something different to the table.
Wood handles are classic. They soak up shock and feel good in the hand—hickory and ash are common. They’ll eventually break, but swapping them out is cheap and easy.
Steel handles are all about durability. They’re tough, but heavy, and you’ll feel more vibration. Pros often go for steel on rough job sites.
Fiberglass handles balance strength and weight. They hold up better than wood in bad weather and have a bit of flex to cut down on shock. Lots of new hammers use fiberglass for this reason.
Titanium handles are lighter and hit harder—almost 97% of your swing translates into force. They’re pricey, but if you’re swinging all day, your arms will thank you.
Shock Absorption Innovations
Modern hammers have come a long way in making things easier on your body. I’ve noticed I can work longer when I use these newer designs.
Grip coverings—think rubber or foam—wrap around the handle to cushion your hand. Some grips are textured so they don’t slip, even if you’re sweating or working in the rain.
Anti-vibration systems are built into some handles. They use dampening materials or flexible joints to cut down on the shock. Some claim up to 70% less vibration, which is wild.
Ergonomic handle shapes spread out the pressure on your palm. Contoured grips and tapered handles help with balance and comfort.
Shock-absorbing materials inside the handle flex with each hit. Fiberglass handles are especially good at this thanks to the material itself.
Most Common Hammer Types

From what I’ve seen, three basic hammers show up in almost every toolkit. The claw hammer, the ball peen, and the sledgehammer each have their own sweet spot.
Claw Hammer Overview
The claw hammer is my go-to for most jobs. The flat face drives nails, and the curved claw yanks them back out.
Most of the ones I use are 16 to 20 ounces. I lean toward wood or fiberglass handles—they’re just easier on the hands.
There are two main styles:
- Curved claws – Best for pulling nails
- Straight claws – Handy for prying and demo work
The head usually has a smooth face to avoid marring surfaces. I use this hammer for framing, general carpentry, and lots of home repairs.
For heavy-duty jobs, I’ll grab a 20-ounce model. For lighter or finish work, a 12-16 ounce hammer is perfect.
Ball Peen Hammer Functions
Ball peen hammers are my mainstay for metalwork. The flat side drives punches, the rounded end shapes metal.
I use the ball end for things like setting rivets or curving sheet metal. The steel head can take a lot of abuse without denting.
Weight options I use:
- 4-8 ounces – For precision stuff
- 12-16 ounces – General shop work
- 24-32 ounces – Heavy-duty fabrication
Handles on ball peens are usually shorter, which gives more control for detail work. I rely on these for car repairs, jewelry making, and some blacksmithing.
The tempered heads keep their shape, even after a lot of use.
Sledgehammer Applications
Sledgehammers are the heavy hitters. Mine weigh anywhere from 4 to 16 pounds, depending on what I’m busting up.
Lighter sledges (4-8 pounds) are good for breaking up small concrete bits or driving stakes. The big guns (12-16 pounds) come out for major demolition and foundation work.
Both ends of the head are striking faces, and the long handle—usually 28 to 36 inches—lets you really put your back into it.
Here’s what I use them for:
- Breaking concrete and bricks
- Driving fence posts
- Demolition
- Splitting wood
The steel head can take a beating. I always double-check the handle for tightness; a loose handle is just asking for trouble.
Specialized Hammers for Unique Applications

Some jobs need a hammer that’s built for the task. Construction and masonry, especially, call for specific head shapes, weights, and handle lengths to make tough jobs easier.
Framing Hammers for Construction
For serious construction, framing hammers are the way to go. They’re heavier—usually 20 to 32 ounces—so you can drive big nails with fewer swings.
The longer handle gives more leverage, and the waffle-patterned face grips nails so they don’t slip off.
Key Features:
- Weight: 20-32 ounces for extra punch
- Handle length: 16-18 inches
- Face pattern: Waffle/milled for grip
- Claw design: Straight claw for prying boards
These hammers are a must for driving 16-penny nails and bigger fasteners. The extra heft means you don’t have to swing as many times.
Club Hammer and Masonry Tasks
Club hammers are my pick for demolition and masonry. Short handles, heavy heads—these things pack a punch in tight spaces.
They’re usually 2 to 4 pounds, which is just right for breaking up concrete or driving chisels.
Common Applications:
- Busting up concrete
- Driving chisels and punches
- Demolition where space is tight
- Setting stones or pavers
With two striking faces, you can swing either way. I grab a club hammer when a sledge is overkill, but a regular hammer just isn’t enough.
Don’t forget safety gear. Eye protection and gloves are a must.
Drywall and Brick Hammers
Drywall hammers are built for—you guessed it—drywall. They’ve got a hatchet blade for cutting and a magnetic nail holder for easy one-handed work.
The serrated edge helps score drywall for cleaner, more precise breaks. That magnetic end is a lifesaver when you need to hold nails in awkward spots.
Brick hammers have a chisel blade on one end and a flat face on the other. The chisel is used for cutting and shaping bricks, while the flat side is used to tap them into place.
Brick Hammer Specs:
- Weight: 20-40 ounces
- Chisel width: Usually 1-2 inches
- Handle: Hickory for shock absorption
I keep the chisel sharp for cleaner cuts. These hammers also do well with concrete blocks and tile.
Mallets and Soft-Faced Hammers

Mallets and soft-faced hammers are what I reach for when I need to protect delicate surfaces. They use rubber, plastic, wood, or even soft metal faces to avoid leaving marks, especially on finished work or when things need to fit just right.
Mallet Types and Uses
Mallets come in a bunch of varieties, each with a job in mind. Rubber mallets have big, soft rubber heads that don’t leave marks—super handy when you care about the finish.
Wood mallets are my go-to for woodworking and putting furniture together. The wooden face pushes joints tight without denting your project.
Plastic mallets are surprisingly versatile. I reach for them with car repairs or delicate assemblies because they hit hard enough but won’t mess up painted surfaces.
Leather mallets shine in jewelry or metalwork. The soft leather shapes metal gently, so you don’t get ugly hammer marks everywhere.
Here are the most common mallet applications:
- Woodworking assembly and joinery
- Tile installation and adjustment
- Automotive bodywork
- Upholstery and fabric work
- Jewelry and metalcraft
Rubber Mallet Benefits
Rubber mallets have a few real perks that make them must-haves. The rubber head soaks up impact, which means less shock and vibration in your hands.
Color matters too. Red rubber won’t mark wood, and white rubber is safer for light materials—no weird stains showing up later.
The broad head spreads out the force, so you don’t end up with dents like you might with a metal hammer. I use them for all sorts of things:
- Installing laminate flooring
- Adjusting tile positions
- Assembling furniture joints
- Tent stake installation
Pick one with a comfy handle if you can. Less rebound means your arms won’t hate you after a long day.
Soft-Faced and Dead Blow Hammers
Soft-faced hammers are clever—swap out faces made of copper, plastic, or lead when they wear down. Saves money in the long run.
Copper faces are great for hitting steel (no sparks), and plastic faces keep finished surfaces safe.
Dead blow hammers are filled with shot inside, so there’s barely any bounce-back. The shot shifts forward when you hit, pushing all the force into your target.
Dead blow hammers really help with:
- Reduced operator fatigue
- More accurate striking
- Less surface damage
- Better control in tight spaces
I end up using dead blow hammers a lot for auto work and machine assembly. The controlled hit keeps parts from shifting after you strike.
The shot-filled head also keeps the vibration out of your hands and arms, which is a relief.
Other Notable Hammer Types

Let me dig into two more categories: tack hammers for precise fastening, and specialty hammers built for very specific jobs.
Tack Hammer Requirements
Tack hammers are my pick for tiny nails and upholstery. They’re light, usually around 3-8 ounces, so you get control without fatigue.
The head is what matters most. I love a magnetic face—it holds the little tacks so you don’t drop them every two seconds.
Key features I look for:
- Small, lightweight head for control
- Magnetic face for holding tacks
- Comfortable grip for extended use
- Fine balance for precision strikes
I use tack hammers for upholstery, picture frames, and crafts. The magnetic bit really speeds things up with brads and finishing nails.
Some have a claw end for pulling tiny nails. I pick based on whether I need just striking or a little more versatility.
Specialty Hammers and Their Roles
There are so many weird, specialized hammers out there. They’re built to fix problems that regular hammers just can’t touch.
Copper hammers are perfect if you need non-sparking tools. I keep one handy for jobs near anything flammable, since steel hammers are a fire risk.
Scaling hammers are all about scraping rust and scale off metal. The pointed ends are surprisingly effective.
Chasing hammers are my pick for jewelry and decorative metalwork. Their small heads give you the control you need for detail work.
Hatchet-style drywall hammers are a two-in-one deal: cut drywall with the blade, then drive nails with the waffle face.
Lineman’s hammers are for electrical work. The straight claws pull wire and drive staples into poles—pretty niche, but essential if you need it.
Hammer Sizes and Selecting the Right Tool

Hammer size has a big impact on how well and how safely you can work. Picking right means matching weight, handle length, and the head to your job.
How Hammer Size Impacts Performance
Size changes everything—force, control, even your energy level. Too heavy and you’ll tire out fast or wreck your project. Too light and you’ll swing forever without much to show for it.
Weight is a big deal. A 16-ounce hammer drives nails faster than an 8-ounce hammer, but lighter hammers are easier on your arm if you’re working all day.
Handle length is another factor. Longer handles give you more power, but it’s easier to miss. Short handles are better for detail work.
If you pick the wrong size, you risk dropping the hammer or missing and hurting yourself. Balance is just as important as weight—a well-balanced hammer feels lighter and doesn’t strain your wrist as much.
Typical Hammer Sizes and Applications
Different jobs call for different sizes. Here’s a quick breakdown:
| Hammer Type | Weight | Handle Length | Best Uses |
|---|---|---|---|
| Tack Hammer | 4-8 oz | 10-12 inches | Small nails, upholstery |
| Claw Hammer | 8-20 oz | 12-16 inches | General carpentry, household tasks |
| Framing Hammer | 20-32 oz | 16-18 inches | Heavy construction, large nails |
| Ball Peen | 8-32 oz | 12-16 inches | Metalwork, shaping |
| Club Hammer | 2-3 lbs | 10-12 inches | Masonry, light demolition |
| Sledgehammer | 4-20 lbs | 16-36 inches | Heavy demolition, driving stakes |
Light work (4-12 oz) is for precision stuff—think furniture or tiny repairs. Medium work (16-20 oz) handles most home and carpentry projects.
Heavy work (20+ oz) is for demolition or framing, when you need real power.
Choosing the Right Hammer for the Job
I think about three things: what I’m doing, how fragile the material is, and what I can actually handle physically.
For precision work, I stick with 8-16 oz hammers and short handles. They’re just easier to control for trim or delicate stuff.
For general building, 16-20 oz claw hammers are a sweet spot. They drive most nails and don’t wear me out too fast.
For heavy-duty jobs, I grab a 20+ oz hammer or even a sledgehammer. That’s what you need for framing, demo, or big stakes.
Material matters—soft wood gets a light hammer, hard stuff needs something heavier.
Honestly, my own strength is a big part of it. I try different weights until I find one I can swing for a while without getting sore.
If I’m using a hammer every day, I invest in one that’s ergonomic. It makes a difference by the end of the week.
Modern Handle Technologies and Ergonomics
Hammer handles have come a long way. These days, fiberglass handles are popular because they cut down on fatigue and last a lot longer than wood. Steel handles are out there too, mostly for really heavy-duty jobs.
Fiberglass Handles: Advantages
I usually recommend fiberglass handles for construction. They’re great at soaking up shock, and the material is a blend of glass fibers and resin, making it light but tough.
Key Benefits:
- Durability: Fiberglass doesn’t crack or split as easily as wood
- Weather resistance: It doesn’t swell or shrink in different temps
- Shock reduction: Cuts down on vibration
The lighter weight means you can work longer before your arm gives out. Even when things get messy, the handle keeps its grip pretty well.
Most brands throw a rubber grip on top of the fiberglass, which helps a lot with comfort and control. Plus, the head seldom loosens up—unlike wood handles that sometimes need tightening or fixing.
Steel Handles: Strengths and Weaknesses
Steel handles deliver serious durability and a ton of striking power. I reach for steel-handled hammers when I’m doing heavy demolition work and need every ounce of force.
Advantages:
- One-piece construction means you’re not dealing with loose heads.
- They’re basically unbreakable if you’re using them normally.
- You get maximum power transfer right to your target.
Disadvantages:
- All that vibration goes straight to your hands and can wear you out.
- The extra weight can really add up, making your arms tired fast.
- Cold metal is just miserable to hold in winter—no sugarcoating that.
Many steel handles now come with rubberized grips. That grip helps soak up some of the shock and gives you a bit more control.
I’d only grab a steel handle for those brutal, heavy-duty jobs. If you use them all the time, the vibration might start messing with your joints, and that’s not something you want to ignore.


Leave a Reply